
Step 4: Add Vanilla and Salt
Immediately stir the vanilla extract and salt into the melted chocolate mixture.
The small amount of salt helps balance the sweetness while making the chocolate flavor taste fuller.
Stir until everything is evenly incorporated.
Step 5: Create the First Layer
Pour approximately half of the chocolate mixture into your prepared pan.
Use a spatula to gently spread it into an even layer.
You don’t need to make it perfectly flat at this stage, but try to distribute the chocolate evenly from corner to corner.
Step 6: Add the Peanut Butter Layer
Carefully spoon the peanut butter mixture over the chocolate.
Spread it gently using a spatula.
Because the chocolate underneath may still be warm, avoid pressing too aggressively. Work slowly until you have an even peanut butter layer.
If the mixture sticks to your spatula, lightly grease the spatula or place a piece of parchment over the surface and gently press the mixture into place.
Step 7: Finish With Chocolate
Pour the remaining chocolate mixture over the peanut butter layer.
Spread it carefully until the entire surface is covered.
For a simple decorative effect, drag a toothpick or the tip of a knife lightly across the surface to create subtle swirls.
You can also sprinkle chopped peanuts or a tiny amount of flaky salt over the top while the chocolate is still soft.
Step 8: Let the Fudge Set
Allow the pan to cool at room temperature for approximately 20–30 minutes.
Then transfer it to the refrigerator.
Let the fudge chill for at least 2–3 hours, or until it feels firm when gently pressed.
For the cleanest slices, leaving it refrigerated for several hours or overnight works especially well.
Step 9: Remove the Fudge
Once completely set, grab the edges of the parchment paper and gently lift the entire fudge block from the pan.
Place it on a cutting board.
If the fudge is very cold and firm, allow it to sit at room temperature for about 5–10 minutes before cutting.
This makes slicing easier and reduces the chance of cracking.
Step 10: Cut Into Squares
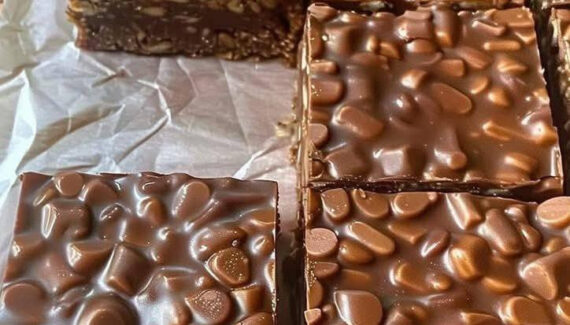
Use a sharp knife to cut the fudge into squares.
For clean edges, wipe the knife with a warm, slightly damp cloth between cuts.
You can make large squares for a generous dessert or smaller pieces for a party platter.
Remember that fudge is quite rich, so small pieces are often the perfect serving size.
Tips for Perfect Chocolate Peanut Butter Fudge
Use creamy peanut butter
Creamy peanut butter produces the smoothest texture. Natural peanut butter can sometimes separate and make the mixture more difficult to work with.
Keep the chocolate on low heat
The goal is simply to melt the ingredients together. High heat isn’t necessary and can damage the chocolate’s texture.
Don’t rush the chilling process
The fudge needs sufficient time to firm up. Cutting it too early can result in soft, messy pieces.
Measure powdered sugar carefully
Too much powdered sugar can make the peanut butter layer overly dense, while too little can leave it too soft.
Add toppings before chilling
If you’re using peanuts, chocolate chips, or flaky salt, sprinkle them over the fudge while the top is still soft so they adhere properly.
Easy Variations
Chocolate Peanut Butter Swirl Fudge
Instead of creating distinct layers, alternate spoonfuls of chocolate and peanut butter mixtures in the pan. Drag a knife through the mixture several times to create a marbled pattern.
Crunchy Peanut Butter Fudge
Replace some of the creamy peanut butter with crunchy peanut butter for little pieces of roasted peanuts throughout the center.
Extra-Chocolatey Version
Use dark chocolate chips instead of semi-sweet chocolate for a deeper cocoa flavor.
Peanut Butter Cup Style
Scatter chopped peanut butter cups over the top before refrigerating for an extra peanut-butter-and-chocolate finish.
Salted Chocolate Peanut Butter Fudge
Finish the top with a very light sprinkle of flaky sea salt. The contrast between the salty topping and sweet fudge can make the chocolate and peanut butter flavors stand out beautifully.
How to Store It
Store the finished fudge in an airtight container.
At room temperature, it can generally be kept for several days in a cool environment. For longer storage, refrigerate it.
Place parchment paper between layers if you’re stacking the squares so they don’t stick together.
You can also freeze fudge in a well-sealed, freezer-safe container. When you’re ready to enjoy it, allow the pieces to thaw gradually in the refrigerator before bringing them to room temperature.
Serving Ideas
Chocolate peanut butter fudge is delicious on its own, but you can make it part of a larger dessert spread.
Serve small squares alongside:
- Fresh strawberries
- Vanilla ice cream
- Chocolate cookies
- Hot cocoa
- Coffee or tea
- A platter of homemade candies
For gifting, arrange the pieces in a small decorative box lined with parchment or candy paper.
Common Mistakes to Avoid
Cooking the chocolate over high heat: This can cause scorching or a grainy texture.
Adding too much liquid to the peanut butter mixture: The center needs to remain thick enough to set properly.
Cutting before the fudge is fully chilled: This can produce uneven or soft squares.
Using an unlined pan: Removing set fudge directly from the pan can be difficult and may damage the edges.
Making the pieces too large: Because fudge is rich, smaller squares are usually more enjoyable and easier to serve.
Final Thoughts
Homemade Chocolate Peanut Butter Fudge is a wonderful example of how a few familiar ingredients can become something much more special. The combination of silky chocolate and creamy peanut butter creates a dessert with contrasting flavors and textures in every bite.
The recipe is straightforward enough for a beginner but impressive enough to serve at celebrations or package as a homemade gift. Once you’ve mastered the basic version, you can experiment with swirls, crunchy peanuts, chocolate toppings, or a touch of flaky salt to create your own signature variation.
The most important things to remember are low heat, careful mixing, and plenty of chilling time. Follow those three principles, and you’ll have neat, creamy fudge that’s ready to slice, share, and enjoy.






No Responses Yet