⭐ Why It’s “Better Than Anything”
- Simple ingredients – Nothing fancy or artificial.
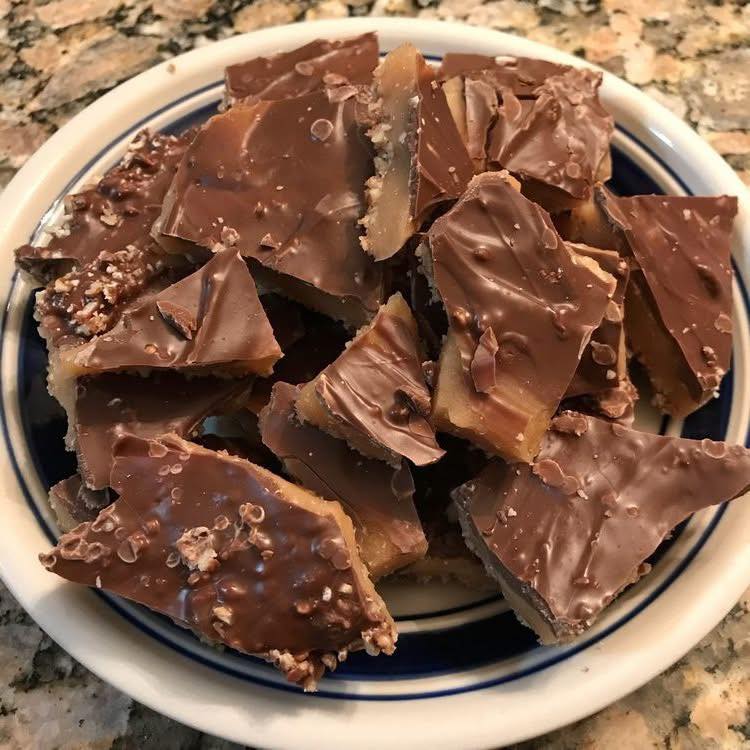
- Irresistible texture – Crisp, buttery toffee layer topped with creamy chocolate.
- Customizable – Use your favorite chocolate or nuts.
- No candy thermometer needed (though it helps for precision).
🧾 Ingredients
- 1 cup (2 sticks) unsalted butter
- 1 cup granulated sugar
- 1/4 teaspoon salt
- 1 teaspoon pure vanilla extract
- 1 cup semi-sweet or milk chocolate chips (use more if you like a thicker chocolate layer)
- 1/2 to 3/4 cup chopped toasted pecans or almonds
🔥 Optional but recommended: A candy thermometer for perfect toffee every time.
🍳 Equipment
- Heavy-bottomed saucepan
- Wooden spoon or heat-resistant silicone spatula
- Baking sheet (lined with parchment paper or a silicone baking mat)
- Small offset spatula (for spreading chocolate)
- Candy thermometer (optional)
👩🍳 Step-by-Step Instructions
Step 1: Prepare Your Surface
Line a baking sheet with parchment paper or a silicone mat and set it aside. This will be your toffee’s home, so make sure it’s on a flat, heat-safe surface.
Step 2: Melt the Butter
In a heavy-bottomed saucepan, melt the butter over medium heat. Stir frequently to prevent scorching.
Step 3: Add Sugar and Salt
Once the butter has melted completely, stir in the sugar and salt. Continue stirring until the mixture is fully combined. The sugar will look grainy at first, but don’t worry—it will melt down.
Step 4: Cook the Toffee
Keep stirring the mixture constantly over medium heat. It will begin to bubble and thicken. You’re aiming for a deep amber color—this is the hard crack stage, around 300°F (150°C).
If you’re not using a thermometer, watch for color and smell: once it turns golden brown and smells nutty, you’re there. This usually takes 10–15 minutes.
⚠️ Important: Stir gently but constantly so the butter and sugar don’t separate. If it smells burnt, remove from heat immediately.
Step 5: Add Vanilla and Pour
Turn off the heat and stir in the vanilla extract (it may bubble briefly). Immediately pour the toffee mixture onto your prepared baking sheet and use a spatula to spread it out evenly—roughly 1/4 inch thick.
Be quick here, as the toffee sets fast!
Step 6: Add the Chocolate
While the toffee is still hot, sprinkle the chocolate chips evenly over the top. Let them sit for 2–3 minutes to melt, then use a spatula to gently spread the melted chocolate into a smooth layer.
Step 7: Add the Nuts
Sprinkle the chopped nuts over the melted chocolate and press them in lightly so they stick as the chocolate hardens.
Step 8: Cool and Break
Let the toffee cool at room temperature for 1–2 hours (or speed it up in the refrigerator for 30–45 minutes). Once completely set, break it into pieces by hand or use a knife for cleaner shards.
🧠 Tips for Perfect Toffee Every Time
- Use real butter — Margarine or butter substitutes don’t work well here.
- Avoid humidity — Toffee can get sticky if made on humid days.
- Don’t rush the cooking process — Medium heat is ideal. High heat increases the risk of burning.
- Don’t stir too aggressively — Stir gently and consistently.
🍫 Variations to Try
- Espresso Toffee – Add 1/2 tsp of instant espresso powder to the sugar mix for a mocha twist.
- White Chocolate & Pistachio – Use white chocolate chips and chopped pistachios for a green-gold holiday version.
- Sea Salt Caramel Toffee – Sprinkle sea salt on top of the chocolate before it sets for a salted caramel feel.
🧊 Storage
- Store in an airtight container at room temperature for up to 2 weeks.
- For longer storage, freeze in ziplock bags for up to 3 months.
✨ Final Thoughts
This “Better Than Anything Toffee” is one of those recipes that wins hearts instantly. It’s buttery, rich, crunchy, chocolatey, and sweet—with just enough nutty crunch to keep things interesting. It’s easy enough for beginners, yet impressive enough to gift or serve at special events.
Give it a try, and don’t be surprised if it becomes your signature sweet treat.
Would you like a printable version of this recipe or a recipe card for social media sharing?


No Responses Yet