Certainly! Here’s a detailed and unique article about creating Colorful Bottle Lights DIY — a magical way to illuminate any space with charm and creativity.
Colorful Bottle Lights DIY: A Magical Glow for Any Space
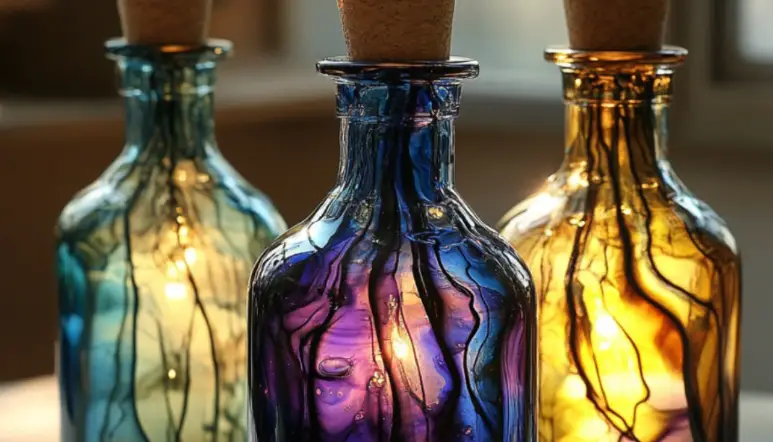
In an age where personalization and ambiance matter more than ever, transforming ordinary objects into luminous decor pieces is a trend that’s here to stay. One of the most enchanting and budget-friendly ways to add atmosphere to your home, balcony, or party space is by making your own Colorful Bottle Lights. These glowing creations turn recycled bottles into radiant art, perfect for cozy nights, festive gatherings, or romantic dinners under the stars.
The best part? You don’t need to be an artist or engineer to do it. With just a few simple tools and a bit of creativity, anyone can bring this magical glow into their space.
Why Make Colorful Bottle Lights?
- Eco-Friendly – Reuse empty glass or plastic bottles creatively.
- Budget-Friendly – Most materials are inexpensive or already in your home.
- Customizable – Choose any color, shape, and style to match your decor.
- Magical Ambiance – Perfect for mood lighting, centerpieces, or gifts.
Materials You’ll Need
Here’s everything you need to get started:
- Clean, empty glass or plastic bottles (wine bottles, soda bottles, mason jars, etc.)
- Fairy lights or LED string lights (battery-operated recommended)
- Glass paint or permanent markers (optional, for coloring)
- Mod Podge or clear glue (optional)
- Tissue paper or colored cellophane (optional for glowing color effect)
- Cork light lids (optional; available online with built-in LEDs)
- Decorative elements – twine, ribbon, beads, etc.
- Craft knife or glass drill bit (if inserting lights through the bottom or side)
- Rubber gloves and safety glasses (if drilling glass)
Step-by-Step Guide: How to Make Colorful Bottle Lights
Step 1: Choose and Clean Your Bottles
Pick bottles of various sizes and shapes — wine bottles for elegance, soda bottles for a vintage touch, or mason jars for rustic charm. Wash them thoroughly and remove all labels. Soaking in warm soapy water helps peel off stubborn glue.
Tip: Use rubbing alcohol to remove any leftover adhesive or residue.
Step 2: Add Color (Optional but Magical)
There are three ways to color your bottle:
- Glass Paints: Apply stained glass paint from the inside or outside for a translucent effect.
- Tissue Paper & Glue: Tear colored tissue paper into small pieces, apply Mod Podge or diluted glue to the bottle’s surface, and layer the tissue to create a mosaic.
- Permanent Markers: Create hand-drawn designs directly on the glass.
Let your colored bottles dry for several hours or overnight.
Step 3: Prepare the Lights
Battery-operated fairy lights or cork LED bottle lights are ideal. These give you portability without worrying about electrical outlets. If you’re using standard string lights:
- Insert them through the bottle’s neck.
- OR carefully drill a small hole near the base (only for glass bottles and with proper safety precautions).
Important: Never use lights that generate heat in closed glass bottles — always choose LEDs for safety.
Please Head On keep on Reading (>)


No Responses Yet