The Night Before:
-
Flour Your Bacon:
Pour some flour into a shallow bowl. Dredge each bacon slice in the flour, coating both sides evenly. Gently shake off the excess. -
Lay It Out:
Arrange the floured bacon in a single layer on a parchment-lined baking sheet. If you need to stack, place parchment paper between layers. -
Chill:
Cover the pan with beeswax wrap or another parchment layer. Let it sit in the fridge overnight. This helps the flour stick and makes the bacon even crispier when cooked.
The Morning Of:
-
Preheat the Oven:
Heat to 400°F (200°C). -
Bake the Bacon:
Remove your prepped bacon from the fridge and lay it flat on a baking sheet lined with parchment.
Bake for 5 minutes, then flip the slices and continue baking another 5–7 minutes, or until perfectly browned and crunchy. -
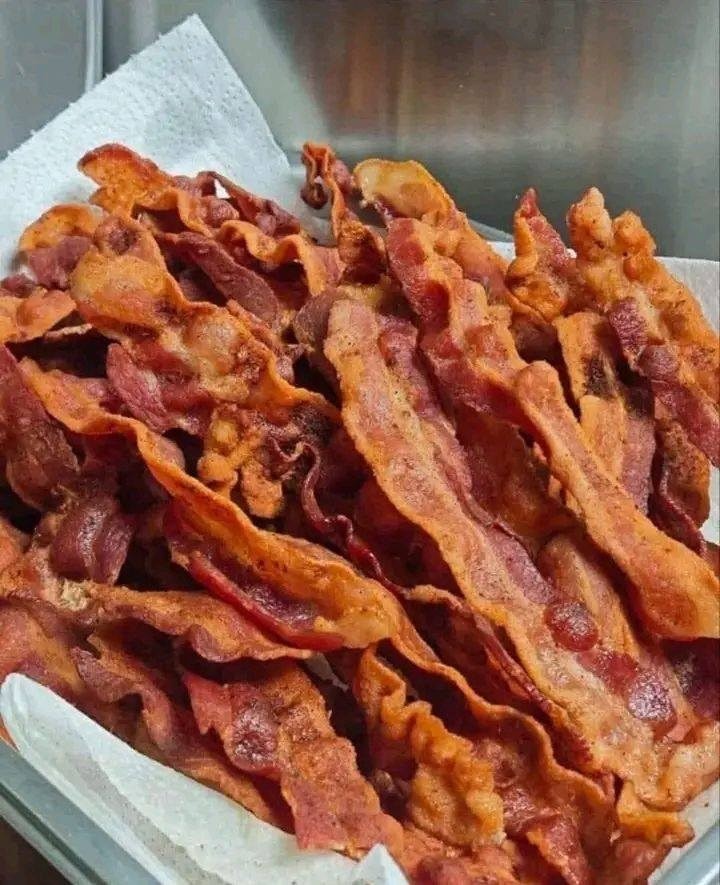
Drain and Serve:
Transfer the crispy strips to a paper towel-lined plate to absorb any remaining grease. Serve warm—and try not to eat them all before they reach the table!
Why the Shape Matters
Aside from flavor, this method gives you beautifully straight bacon strips—ideal for breakfast sandwiches, BLTs, or topping a fresh salad. Plus, it avoids those annoying bacon curls that cook unevenly or won’t fit on your toast.
My kids have now started asking for the “straightest bacon” like it’s a competition, and I can’t help but laugh every time. 😄
Final Thoughts: Worth the Effort
Yes, this trick takes a little prep—but the result? Next-level bacon. The kind of bacon that earns compliments, gets devoured instantly, and has everyone asking how you did it.
Skip this hack if you want, but once you try it, you won’t want to go back to ordinary methods. Whether you’re hosting a family brunch or just want a better start to your morning, this bacon upgrade is a total game-changer.
Give it a try, and prepare to become the bacon MVP in your household. 🥓✨


No Responses Yet