
Step 4: Add Egg and Vanilla
Mix in the egg and vanilla extract until fully combined. Scrape down the sides of the bowl to ensure everything blends evenly.
Step 5: Combine Wet and Dry Ingredients
Gradually add the dry ingredient mixture to the wet ingredients. Mix just until a soft dough forms. Avoid overmixing, as this can make the bars dense instead of tender.
Step 6: Press Dough into the Pan
Transfer the cookie dough to the prepared baking pan. Press it evenly across the bottom using a spatula or your hands. Make sure the surface is smooth for even baking.
Step 7: Bake the Cookie Base
Bake for 18–22 minutes, or until the edges are lightly golden and the center is set. The cookie base should be soft but not raw.
Remove from the oven and allow it to cool slightly.
Step 8: Add the Chocolate Layer
While the cookie base is still warm, sprinkle the chocolate chips or chopped chocolate evenly over the top. Let them sit for a few minutes to melt, then gently spread the chocolate into a smooth layer using a spatula.
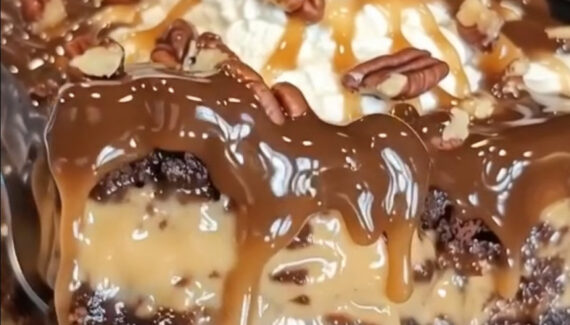
Step 9: Drizzle the Caramel
Warm the caramel sauce slightly so it’s easy to drizzle. Spoon or drizzle it over the melted chocolate layer, creating swirls or lines across the surface.
Step 10: Finish with Sea Salt
Sprinkle flaky sea salt over the caramel layer. This step enhances the sweetness and brings out the rich chocolate and buttery cookie flavors.
Step 11: Cool and Set
Allow the bars to cool completely at room temperature, or refrigerate briefly to help the layers set. Once firm, lift the bars out using the parchment paper and cut into squares or rectangles.
Serving and Storage Tips
- Serve at room temperature for the best texture
- Store in an airtight container for up to 4 days
- For clean slices, use a sharp knife wiped between cuts
Final Thoughts
Salted caramel chocolate sugar cookie bars combine everything people love about dessert: a soft buttery base, rich chocolate, gooey caramel, and a hint of salt to tie it all together. They’re simple enough for beginner bakers but impressive enough to serve on special occasions.
Once you make these bars, they’re sure to become a go-to favorite for both casual treats and celebrations. 🍪✨


No Responses Yet