Step-by-Step Instructions:
1. Melt the Ingredients:
- In a microwave-safe bowl, combine the sweetened condensed milk, chocolate chips, and butter. Microwave on high for 30-second intervals, stirring in between, until the mixture is fully melted and smooth. This should only take about 1-1.5 minutes total, but be sure to stir after each interval to prevent the chocolate from burning.
2. Stir in the Vanilla:
- Once everything is melted and smooth, add the vanilla extract and stir until well combined. This will give your fudge a beautiful depth of flavor.
3. Pour and Set:
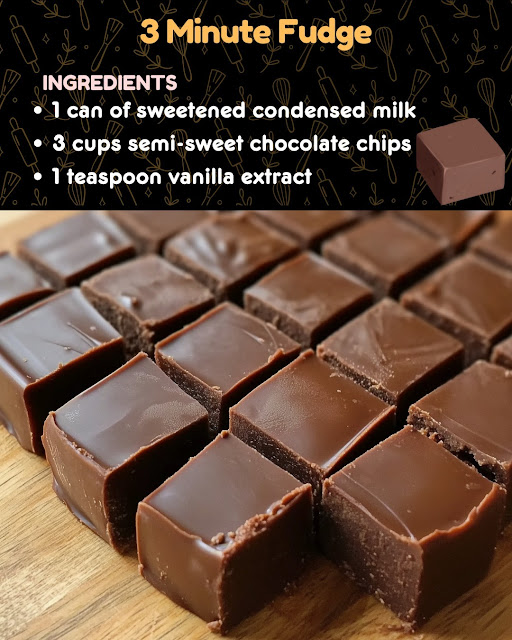
- Line a small square or rectangular baking dish (about 8×8 inches) with parchment paper or lightly grease it. Pour the melted fudge mixture into the dish, spreading it evenly with a spatula.
- Let the fudge cool to room temperature, then refrigerate for at least 1-2 hours, or until firm. The refrigeration helps the fudge set and become perfectly sliceable.
4. Cut and Serve:
- Once the fudge has cooled and firmed up, cut it into small squares or rectangles. Serve and enjoy!
Tips for the Best 3-Minute Fudge:
- Choose Good Quality Chocolate: The better the chocolate, the better the fudge will taste. While you can use any kind of chocolate chips, opting for high-quality chocolate will elevate the flavor of your fudge.
- Add-ins and Toppings: Get creative by adding your favorite mix-ins! Try folding in chopped nuts (walnuts, pecans, or almonds), crushed candy, mini marshmallows, or even a swirl of peanut butter or caramel sauce before chilling the fudge.
- Double the Recipe: If you’re serving a crowd or giving it as gifts, you can easily double the recipe. Just make sure to use a larger baking dish or split it into two smaller ones.
- Make it Dairy-Free or Vegan: To make the fudge dairy-free or vegan, use dairy-free sweetened condensed milk (available in most health food stores) and dairy-free chocolate chips.
Flavor Variations to Try:
While this basic fudge recipe is absolutely delicious on its own, there are so many ways you can customize it with different flavors and textures. Here are a few fun variations to try:
- Peanut Butter Fudge: Add 1/2 cup of peanut butter to the melted mixture for a peanut butter chocolate fudge combo. You can also swirl extra peanut butter on top before refrigerating for added flavor and texture.
- Mint Chocolate Fudge: Add 1/2 teaspoon of peppermint extract along with the vanilla extract for a cool, minty twist on the classic.
- Salted Caramel Fudge: Drizzle caramel sauce on top of the fudge before refrigerating, then sprinkle a pinch of sea salt over the caramel for a delicious sweet-salty contrast.
- Nutty Fudge: Stir in chopped nuts, such as walnuts, almonds, or hazelnuts, before setting the fudge in the fridge. The nuts add crunch and extra flavor to the creamy chocolate base.
- S’mores Fudge: Add mini marshmallows and graham cracker crumbs on top of the fudge before refrigerating for a s’mores-inspired treat.
Why This Fudge is Perfect for Any Occasion:
- Last-Minute Treat: Whether you’re preparing for a party, a holiday gathering, or just want something sweet to enjoy, this 3-minute fudge is a great solution. It’s fast, easy, and impressive.
- Giftable: Package the fudge in a cute jar or box, tie with a ribbon, and you’ve got an adorable homemade gift for friends, family, or neighbors.
- Kids and Adults Love It: This fudge is a hit with people of all ages. It’s rich, sweet, and so easy to make that even kids can get involved in the kitchen and help out.
- No-Bake: Because it doesn’t require baking, it’s a perfect treat to make in the summer when you don’t want to turn on the oven, or any time you’re craving a no-fuss dessert.


No Responses Yet