
Step 3: Assemble the Cheesecake
Remove the chilled crust from the refrigerator.
- Spoon the cheesecake filling onto the crust.
- Spread it evenly with a spatula, smoothing the top.
- Make sure the filling reaches the edges of the crust so it looks neat and even.
At this stage, the cheesecake base is complete.
Step 4: Add the Cherry Topping
Open the cherry pie filling and gently spoon it over the cheesecake layer.
Spread the cherries evenly across the top so every slice will have plenty of fruit. The bright red cherries create a beautiful contrast with the creamy white filling.
Step 5: Chill the Cheesecake
This step is essential for a no-bake dessert.
Place the assembled cheesecake in the refrigerator and allow it to chill for at least 4 hours, though overnight is even better. This resting time allows the filling to firm up so it slices neatly.
Step 6: Slice and Serve
Once the cheesecake is fully chilled:
- Use a sharp knife to cut clean slices.
- Wipe the knife between cuts for perfect presentation.
- Serve cold for the best flavor and texture.
Each bite will deliver a delicious combination of buttery crust, creamy cheesecake, and sweet cherry topping.
Helpful Tips for the Best No-Bake Cheesecake
- Use softened cream cheese so the filling becomes smooth and lump-free.
- Chill long enough — rushing this step may result in a soft cheesecake.
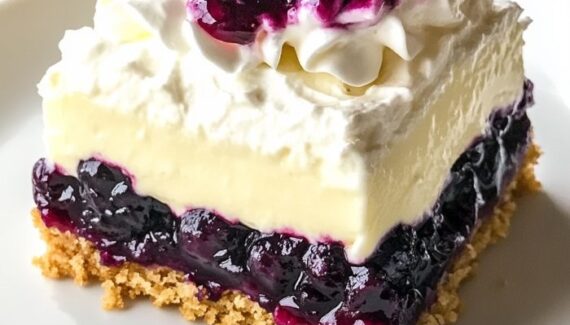
- Try different toppings like strawberries, blueberries, or chocolate sauce.
- For extra flavor, add a little lemon juice or zest to the filling.
Final Thoughts
No-Bake Cherry Cheesecake is one of those desserts that proves you don’t need complicated techniques to create something truly delicious. With simple ingredients and easy preparation, it delivers a dessert that looks beautiful and tastes amazing.
It’s creamy, refreshing, and perfectly sweet — a timeless treat that works for holidays, gatherings, or anytime you want a comforting homemade dessert without turning on the oven.


No Responses Yet