
Step 6: Make the Brownie Batter
Add the dry ingredients to the wet chocolate mixture.
Fold gently using a spatula. Do not overmix. Mix only until you no longer see dry flour.
Overmixing can make brownies tough instead of soft and fudgy.
The batter should be thick, dark, and shiny.
Step 7: Add Extra Chocolate
Fold in the chocolate chips or chopped chocolate.
These pieces melt slightly during baking and create small pockets of rich chocolate inside the brownies.
For an extra indulgent version, you can also add walnuts, pecans, caramel pieces, or white chocolate chips.
Step 8: Bake the Brownies
Pour the batter into the prepared baking pan.
Spread it evenly with a spatula, making sure the corners are filled.
Bake for 28 to 35 minutes, depending on your pan size and oven.
The brownies are ready when the edges look set and the center is slightly soft but not liquid. A toothpick inserted into the center should come out with moist crumbs, not wet batter.
Do not wait for the toothpick to come out completely clean. That usually means the brownies are overbaked.
Step 9: Cool the Brownies
Remove the pan from the oven and let the brownies cool completely in the pan.
This is very important. Fudgy brownies need time to set as they cool. Cutting them too early can make them fall apart.
For cleaner slices, chill the brownies in the refrigerator for 30 to 60 minutes after they reach room temperature.
Step 10: Make the Glossy Chocolate Topping
Place the chocolate chips in a heatproof bowl.
Warm the heavy cream in a small saucepan until it is hot but not boiling.
Pour the hot cream over the chocolate and let it sit for 2 minutes. Then stir slowly until the chocolate melts and becomes smooth.
Add the butter and vanilla extract. Stir again until the glaze looks shiny and silky.
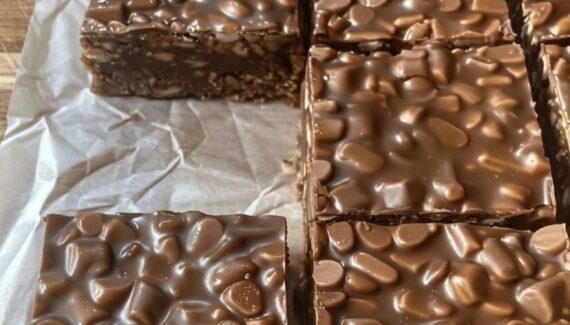
This topping gives the brownies the glossy chocolate finish seen in the picture.
Step 11: Pour the Chocolate Glaze
Pour the chocolate topping over the cooled brownies.
Spread it evenly with a spatula. Let the glaze settle naturally over the surface.
For a thicker topping, chill the brownies for 20 to 30 minutes before cutting.
For a softer, more melted look, let the glaze set at room temperature.
Step 12: Slice and Serve
Lift the brownies out of the pan using the parchment paper.
Use a sharp knife to cut them into squares. For clean cuts, wipe the knife after each slice.
Serve the brownies as they are, or pair them with vanilla ice cream, whipped cream, strawberries, caramel sauce, or a glass of cold milk.
Tips for Perfect Fudgy Brownies
Use good-quality cocoa powder and chocolate. Since chocolate is the main flavor, better chocolate gives a richer result.
Do not overbake. Fudgy brownies should look slightly soft in the center when they come out of the oven.
Let them cool fully before slicing. Cooling helps the inside become dense and smooth.
Use brown sugar for extra moisture and chewiness.
Add a small pinch of espresso powder to deepen the chocolate flavor. It will not make the brownies taste like coffee; it simply makes the chocolate stronger.
Storage
Store the brownies in an airtight container at room temperature for up to 3 days.
For longer storage, keep them in the refrigerator for up to 1 week.
You can also freeze them for up to 2 months. Wrap each brownie square tightly, then thaw at room temperature before serving.
Final Thoughts
Glossy Fudgy Chocolate Brownies are rich, soft, and deeply satisfying. The brownie base is dense and chocolatey, while the smooth chocolate topping adds a beautiful shiny finish. Every bite has the perfect balance of chewy edges, moist center, and creamy chocolate glaze.
This recipe is simple enough for home baking but impressive enough for birthdays, gatherings, dessert tables, or weekend treats.




No Responses Yet