Butterfinger Balls – Don’t LOSE This Recipe!
Craving a sweet, crunchy, and peanut-buttery treat? Butterfinger Balls are the answer! These little bites of heaven are packed with the irresistible flavor of Butterfinger candy bars, combining their iconic peanut-buttery center with a chocolatey exterior. Whether you’re hosting a party, need a sweet treat for the holidays, or simply want to satisfy your candy craving, this recipe is a must-try. Once you taste them, you’ll never want to lose this recipe!
In this article, we’ll guide you through the step-by-step method to make Butterfinger Balls at home, so you can enjoy them fresh anytime. Ready? Let’s dive into this sweet adventure!
🍬 What Are Butterfinger Balls?
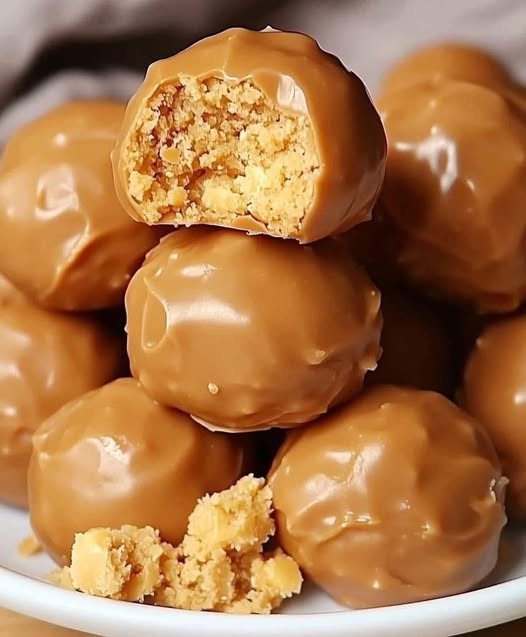
Butterfinger Balls are bite-sized treats made by combining crushed Butterfinger candy bars with a smooth peanut butter mixture, then coating them in melted chocolate. They’re the perfect combination of crunchy, creamy, and chocolaty, offering a flavor that is familiar yet completely irresistible.
These little treats are incredibly easy to make, and they come together in no time with just a few ingredients. Plus, they’re no-bake, making them a hassle-free option for anyone looking to whip up something sweet and delicious.
🧑🍳 Ingredients You’ll Need
For these Butterfinger Balls, you’ll need the following ingredients:
For the Butterfinger Filling:
- 4 Butterfinger candy bars (crushed into small pieces)
- 1 ½ cups powdered sugar (for sweetness and structure)
- ½ cup creamy peanut butter (this adds that signature peanut buttery flavor)
- 4 tablespoons unsalted butter (softened for easier mixing)
- 1 teaspoon vanilla extract (for extra flavor depth)
For the Chocolate Coating:
- 8 oz (about 1 ½ cups) semi-sweet chocolate chips
- 2 teaspoons vegetable oil (to help the chocolate melt smoothly)
🔥 Step-by-Step Instructions to Make Butterfinger Balls
Step 1: Prepare the Butterfinger Filling
1️⃣ Crush the Butterfingers:
- Unwrap the Butterfinger bars and place them in a resealable plastic bag. Use a rolling pin or mallet to gently crush the bars into small pieces. You want some chunks for that satisfying crunch, but nothing too large.
2️⃣ Mix the Peanut Butter Mixture:
- In a medium bowl, combine the creamy peanut butter, softened butter, powdered sugar, and vanilla extract. Use a spoon or a hand mixer to blend everything until you get a smooth, thick mixture. The consistency should be easy to work with but firm enough to hold its shape when rolled into balls.
Step 2: Combine the Crushed Butterfingers with the Peanut Butter Mixture
1️⃣ Add the Crushed Butterfingers:
- Gently fold the crushed Butterfinger pieces into the peanut butter mixture. You’ll want the Butterfingers to be well-incorporated but still maintain a bit of crunch.
2️⃣ Form the Balls:
- Use your hands to roll the mixture into small 1-inch balls. If the mixture feels too sticky, you can lightly grease your hands with butter or spray them with non-stick cooking spray to make the process smoother.
Step 3: Freeze the Butterfinger Balls
1️⃣ Chill the Balls:
- Place the formed balls on a baking sheet lined with parchment paper or a silicone mat. This will prevent them from sticking to the surface.
- Pop the baking sheet in the freezer for 30 minutes to 1 hour. Freezing the balls helps them hold their shape when you coat them in chocolate and gives them a firmer texture.
Please Head On keep on Reading (>) for the FULL ARTICLE:


No Responses Yet