Step 2: First Rise (Bulk Fermentation)
Cover the bowl with plastic wrap or a clean kitchen towel and let the dough rest at room temperature for 8–12 hours. The dough should double in size and develop air bubbles, which means the gluten has developed without kneading.
Step 3: Shape the Dough
After the dough has risen, lightly flour your hands and a clean surface. Gently scrape the dough out of the bowl and shape it into a rough rectangle.
Fold the dough over itself a few times, then form it into a loaf shape. Be gentle to avoid deflating too much of the air.
Step 4: Second Rise (Proofing)
Grease a 9×5-inch loaf pan and place the shaped dough inside. Cover loosely and let it rise for 45 minutes to 1 hour, or until it puffs up and reaches just above the rim of the pan.
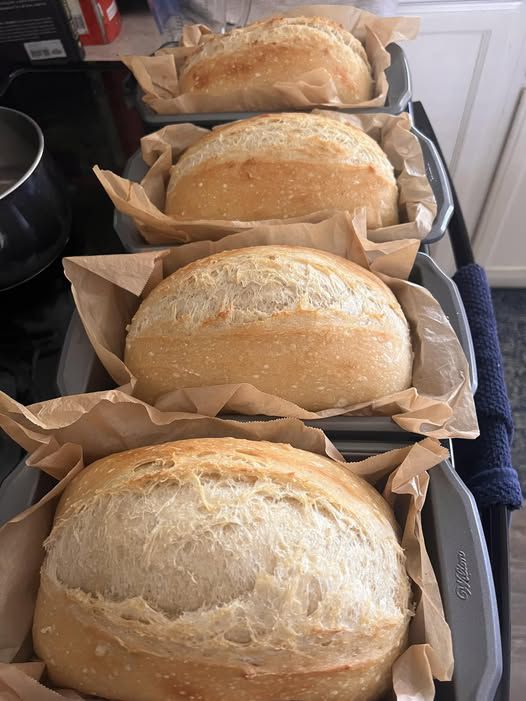
Step 5: Bake the Bread
Preheat your oven to 375°F (190°C). Once preheated, bake the bread for 30–35 minutes, or until the top is golden brown and sounds hollow when tapped.
If you have a kitchen thermometer, the internal temperature should read 190°F (88°C) when fully baked.
Step 6: Cool & Enjoy
Remove the bread from the oven and let it sit in the pan for 5 minutes. Then, transfer it to a cooling rack and let it cool completely before slicing. This step ensures the bread maintains its soft texture.
Tips for the Best No-Knead Sandwich Bread
- Use warm water (not hot) to activate the yeast properly.
- Let the dough rise undisturbed to develop flavor and structure.
- Avoid overhandling the dough when shaping to retain its airiness.
- Store in an airtight container to keep the bread fresh for up to 4 days.
Conclusion
This no-knead sandwich bread recipe proves that making homemade bread doesn’t have to be complicated. With just a few simple ingredients and minimal effort, you can enjoy a delicious, fluffy loaf that’s perfect for sandwiches, toast, or any meal. Try it today, and you’ll never go back to store-bought bread!


No Responses Yet