Step 4: Grind the Seeds
- Use a mortar and pestle or a blender to crush the roasted seeds into a thick paste.
Step 5: Boil the Paste
- Add the paste to a large pot.
- Pour in just enough water to cover the paste (about 2–3 cups).
- Simmer on low heat for 1–2 hours. Stir occasionally.
- As the water boils, you’ll see the oil start to float on top.
Step 6: Skim and Strain
- Once the oil separates and rises to the surface, carefully skim it off using a spoon or ladle.
- Pour the oil through a cheesecloth into a clean jar to remove any impurities.
Step 7: Store the Oil
- Let the oil cool completely.
- Store it in a dark, airtight glass bottle or jar.
- Keep it in a cool place away from sunlight for maximum shelf life (up to 1 year).
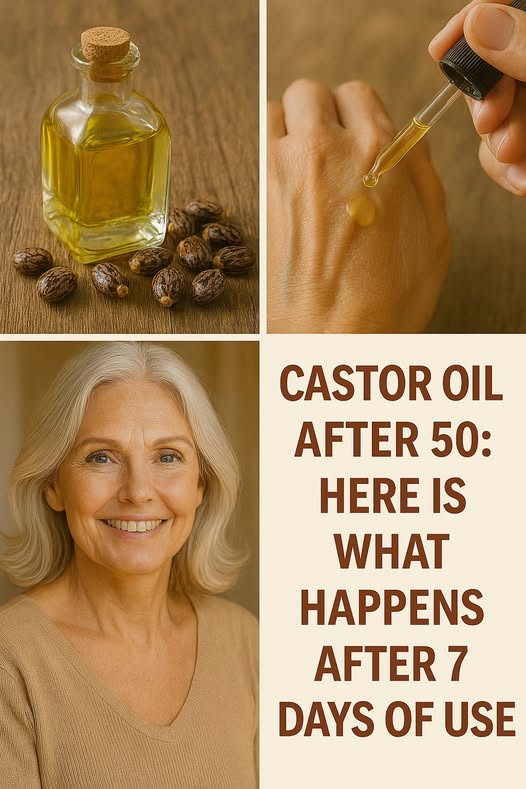
🧴 How to Use Castor Oil in Your Beauty Routine
- Hair Mask: Warm a tablespoon of oil and massage it into your scalp. Leave for 30 minutes before washing.
- Lash and Brow Booster: Dip a clean spoolie in castor oil and apply nightly.
- Facial Moisturizer: Mix a drop with your regular moisturizer or apply directly on dry spots.
- Nail Care: Massage into cuticles daily for stronger, healthier nails.
⚠️ Precautions
- Patch test first: Always test a small area of skin for any allergic reaction.
- Avoid ingestion: Raw castor beans contain ricin, a toxic compound. Only use extracted oil made properly.
- Not for pregnant women: Castor oil can stimulate uterine contractions when ingested.
🌼 Final Thoughts
Nature has provided us with many gifts—and castor oil is certainly one of them. From strengthening hair to healing skin, this simple yet powerful oil has earned its place in the natural beauty hall of fame. By making it at home, you ensure purity and avoid added chemicals found in store-bought versions.
So go ahead—nourish yourself the natural way with homemade castor oil. Your skin and hair will thank you!
If you want a printable or shareable version, or to turn this into a recipe card, just let me know!


No Responses Yet