
Step 3: Add the Eggs and Vanilla
Add the eggs one at a time, mixing well after each addition.
Pour in the vanilla extract and mix until everything is evenly combined.
The mixture should look smooth and creamy at this point. Scrape down the sides of the bowl if necessary so that all of the ingredients are incorporated evenly.
Step 4: Combine the Dry Ingredients
In a separate bowl, whisk together the all-purpose flour, baking soda, and salt.
Mixing these ingredients separately helps distribute the baking soda and salt throughout the flour before they are added to the wet ingredients.
This prevents concentrated pockets of baking soda or salt from ending up in individual cookies.
Step 5: Make the Cookie Dough
Gradually add the dry ingredients to the butter mixture.
Mix on low speed, or stir by hand, just until the flour disappears.
Be careful not to overmix the dough. Once the ingredients are combined, stop mixing. Overworking the dough can develop too much gluten and result in cookies that are tougher than intended.
Step 6: Fold in the Chocolate
Add the semisweet chocolate chips and, if using, the chopped chocolate chunks.
Fold them gently into the dough with a spatula or wooden spoon until the chocolate is evenly distributed.
Using both chocolate chips and chopped chocolate creates an especially satisfying texture. The chips hold their shape while baking, while chopped chocolate melts into the surrounding dough and creates soft pockets of chocolate.
Step 7: Portion the Dough
Use a cookie scoop or tablespoon to portion the dough onto the prepared baking sheets.
Leave approximately 2 inches of space between each portion because the cookies will spread as they bake.
For larger bakery-style cookies, use roughly 2 tablespoons of dough per cookie. For smaller cookies, use about 1 tablespoon.
If you want thicker cookies with a more concentrated flavor, place the portioned dough in the refrigerator for about 30 minutes before baking.
Step 8: Bake the Cookies
Place the baking sheet in the preheated oven and bake for approximately 10–12 minutes.
The edges should look lightly golden while the centers still appear slightly soft.
Do not wait for the centers to become completely firm in the oven. Cookies continue cooking from their residual heat after they are removed, and taking them out while the centers are still soft is one of the keys to achieving a chewy texture.
For more even baking, rotate the baking sheet halfway through if your oven tends to have hot spots.
Step 9: Let Them Cool
Remove the cookies from the oven and allow them to sit on the baking sheet for about 5 minutes.
During this time, the cookies will continue to set while remaining soft in the middle.
After 5 minutes, transfer them to a wire rack to cool completely.
Of course, you don’t have to wait until they’re completely cool before enjoying one. A warm cookie with melted chocolate is one of the best parts of baking them from scratch.
Tips for Perfect Chocolate Chip Cookies
Use Softened Butter
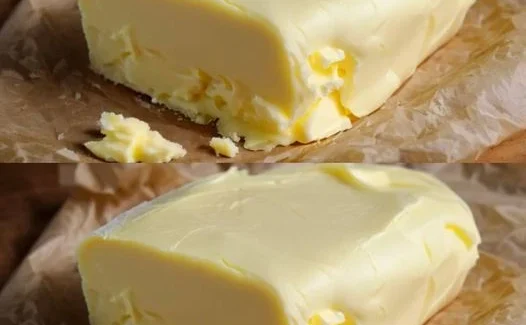
The butter should be soft enough to mix easily but should not be completely melted. Properly softened butter helps create a cookie with a balanced spread and tender texture.
Measure the Flour Carefully
Too much flour can make chocolate chip cookies dry and cakey. For the most consistent results, spoon the flour into your measuring cup and level it off rather than packing it down.
Don’t Overbake
The cookies may look slightly underdone when you first remove them from the oven. That’s exactly what you want. They will continue to firm up as they cool.
If you bake them until the centers look completely finished, they may become too crisp once cooled.
Chill the Dough for Thicker Cookies
If your cookies tend to spread too much, chilling the dough can help. Even 30 minutes in the refrigerator can make a noticeable difference.
For an even deeper flavor, the dough can be refrigerated for several hours before baking.
Add Extra Chocolate
If you’re a serious chocolate lover, reserve a small handful of chocolate chips or chunks and gently press them into the tops of the dough balls just before baking. This gives the finished cookies an appealing bakery-style appearance and adds extra chocolate in every bite.
How to Store Chocolate Chip Cookies
Once completely cooled, store the cookies in an airtight container at room temperature.
They are best enjoyed within several days, although they can last longer when stored properly.
To bring back some of the softness of a day-old cookie, warm it in the microwave for a few seconds before serving.
You can also freeze the baked cookies. Place them in an airtight freezer-safe container or bag, separating layers with parchment paper.
How to Freeze the Cookie Dough
Freezing the dough is a convenient way to have freshly baked cookies whenever you want them.
Scoop the dough into individual portions and place them on a parchment-lined tray. Freeze until firm, then transfer the portions to a freezer-safe bag or container.
When you’re ready to bake, place the frozen dough portions on a baking sheet and allow a little extra baking time. There’s no need to thaw them completely first.
Final Thoughts
The best chocolate chip cookies don’t require complicated ingredients or advanced baking techniques. The secret is in the details: properly softened butter, accurately measured flour, enough chocolate, gentle mixing, and careful baking.
The finished cookies should have golden edges, soft centers, and generous pockets of melted chocolate. Serve them warm with a glass of cold milk, alongside coffee, or simply enjoy one straight from the cooling rack.
Once you make these cookies at home, they may quickly become the recipe you return to whenever you’re craving something sweet, buttery, and comforting.






No Responses Yet