
Here’s a detailed, unique article on the Cuppa Cuppa Cake, complete with a step-by-step guide for making it:
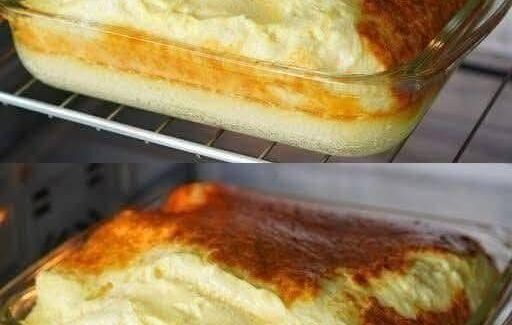
Cuppa Cuppa Cake: A Delight in Every Sip and Bite
The Cuppa Cuppa Cake is a charming dessert that brings together the comfort of a warm beverage with the indulgence of a soft, moist cake. Perfect for tea time, coffee breaks, or as a dessert to impress guests, this cake is subtly sweet, fluffy, and infused with flavors that complement a cozy cup of your favorite drink. What makes it special is the unique way the cake absorbs liquid, giving it a tender, melt-in-your-mouth texture reminiscent of a coffee-soaked sponge but lighter and more delicate.
Here’s a detailed guide on how to make it step by step.
Ingredients
For the Cake:
- 1¾ cups (220 g) all-purpose flour
- 1 tsp baking powder
- ½ tsp baking soda
- ¼ tsp salt
- ¾ cup (150 g) granulated sugar
- ½ cup (115 g) unsalted butter, softened
- 2 large eggs
- ½ cup (120 ml) milk
- 1 tsp vanilla extract
For the “Cuppa” Soak:
- ¾ cup (180 ml) brewed coffee or strong tea, cooled
- ¼ cup (60 ml) milk
- 2 tbsp sugar (optional, depending on sweetness preference)
For the Topping (Optional):
- Whipped cream or frosting
- Cocoa powder or chocolate shavings for garnish
Step-by-Step Method
Step 1: Preheat and Prepare
- Preheat your oven to 350°F (175°C).
- Grease an 8-inch (20 cm) round cake pan and line it with parchment paper for easy removal.
Step 2: Mix Dry Ingredients
- In a medium bowl, sift together flour, baking powder, baking soda, and salt.
- Set aside.
Step 3: Cream Butter and Sugar
- In a large bowl, beat the butter and sugar together using an electric mixer until the mixture is light, fluffy, and pale in color.
- This usually takes about 3–4 minutes.
Step 4: Add Eggs and Vanilla
- Add the eggs one at a time, beating well after each addition.
- Mix in the vanilla extract.
Please Head On keep on Reading (>)


No Responses Yet