
Step 5: Bake the Brownies
Pour the batter into your prepared baking pan and spread it evenly.
Bake for 20–25 minutes.
Check doneness by inserting a toothpick in the center—it should come out with a few moist crumbs, not dry.
Do not overbake! Moisture is key to the classic Lunch Lady texture.
Make the Signature Warm Frosting
Step 6: Start the Frosting While the Brownies Bake
In a medium bowl, beat together:
- Softened butter
- Cocoa powder
Add the milk and powdered sugar gradually, mixing until smooth and creamy.
Finish with vanilla extract.
If the frosting feels too thick, add 1–2 teaspoons more milk.
It should be pourable but not runny.
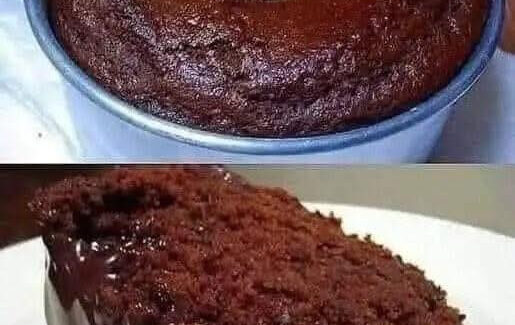
Step 7: Frost the Brownies While Hot
This is the secret step!
As soon as the brownies come out of the oven, pour the warm frosting directly over the hot brownies.
The heat causes the icing to slightly melt into the top, creating:
- A shiny, crackled surface
- A fudgy top layer
- The iconic Lunch Lady finish
Let the brownies cool completely before slicing to allow the frosting to set.
Serving and Storing Tips
To Serve
Cut into squares or rectangles—just like they did in school kitchens.
These brownies are rich, so even small pieces satisfy.
To Store
- Keep in an airtight container at room temperature for up to 3–4 days.
- For longer storage, refrigerate up to 1 week.
- They freeze beautifully for up to 2 months.
Final Thoughts
Lunch Lady Brownies are proof that the simplest recipes often leave the deepest impressions. With their fudgy texture, rich flavor, and nostalgic charm, they’re perfect for potlucks, bake sales, celebrations—or just a cozy afternoon treat.
When you take your first bite, you’ll understand why generations of students remembered these brownies long after school days were over.
If you’d like the printable version, variations, or tips to make them extra fudgy, just let me know!


No Responses Yet