
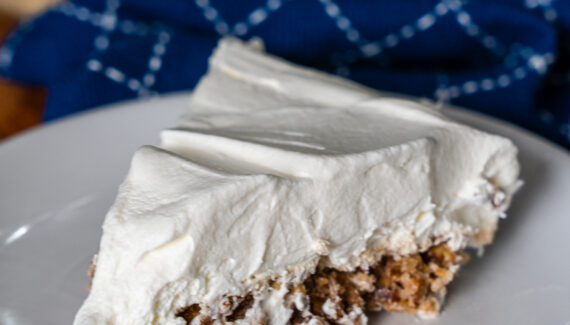
No-Bake Peanut Butter Éclair Cake — a creamy, crunchy crowd-pleaser
This no-bake Peanut Butter Éclair Cake takes the idea of the classic chocolate-topped eclair cake and gives it a peanut-buttery twist: layers of graham crackers (or graham-style cookies), a lush peanut-butter-cream filling, and a glossy chocolate ganache finish. It’s easy to assemble, forgiving, and tastes like an elevated peanut-butter sandwich in cake form — cold, silky, and utterly addictive.
Below you’ll find a reliable, step-by-step method plus helpful tips, variations, and troubleshooting so your cake comes out perfect on the first try.
Yield & timing
- Serves: 10–12
- Active prep time: ~25–35 minutes
- Chill time: 4 hours minimum (best overnight for clean slices)
Ingredients
For the peanut butter filling
- 8 oz (225 g) cream cheese, softened to room temperature
- 1 cup (240 g) creamy peanut butter (natural or commercial — see tips)
- 1 cup (120 g) powdered sugar, sifted (adjust to taste)
- 2 cups (480 ml) heavy whipping cream, cold
- 1–2 teaspoons pure vanilla extract
- Pinch of fine salt (if using unsalted peanut butter)
Alternative quick version: 2 (3.4 oz / 96 g) packages instant vanilla pudding mix + 3 cups (720 ml) cold milk, folded into 1 ½ cups whipped topping (Cool Whip) with ¾–1 cup creamy peanut butter — written method below uses the cream-cheese route for richness.
For the base & layers
- About 2 (8 oz / 226 g) boxes graham crackers (or rectangular tea biscuits / Nabisco Grahams). You’ll use enough to make 3–4 layers in a 9×13-inch pan — roughly 40–45 full-sized sheets.
For the chocolate ganache topping
- 8 oz (225 g) semi-sweet or bittersweet chocolate, chopped (or use chocolate chips)
- ¾ cup (180 ml) heavy cream
- 2 tablespoons unsalted butter (optional, for shine)
Optional add-ins / garnishes
- Chopped peanuts or salted roasted peanuts
- A drizzle of melted peanut butter or melted white chocolate
- Mini peanut butter cups, halved
- Sea salt flakes for finishing
Equipment
- 9×13-inch (23×33 cm) baking pan (glass or metal)
- Large mixing bowl + electric mixer (hand or stand)
- Small saucepan (for ganache) or microwave-safe bowl
- Offset spatula or regular spatula
- Plastic wrap
Step-by-step method
1) Soften & prepare
Take the cream cheese out of the fridge to soften (30–60 minutes beforehand). Keep the heavy cream cold in the fridge until ready to whip — cold cream whips better. Chop the chocolate for the ganache and set aside.
2) Make the peanut butter cream
- In a large bowl, beat the softened cream cheese with an electric mixer until smooth and lump-free (about 1–2 minutes).
- Add the peanut butter and vanilla extract; beat until fully combined and smooth. Scrape the bowl sides.
- Add the sifted powdered sugar and the pinch of salt. Beat until incorporated. Taste and adjust sweetness (add up to ¼ cup more powdered sugar if you want it sweeter).
- In a separate chilled bowl, whip the 2 cups cold heavy cream to stiff peaks. This will take ~3–5 minutes on medium-high with an electric mixer.
- Fold about one-third of the whipped cream into the peanut-butter mixture to loosen it, then gently fold in the remaining whipped cream until evenly mixed. The filling should be light, airy, and scoopable.
(If using the instant pudding shortcut: whisk pudding mixes with cold milk per package until thick, fold in ¾–1 cup peanut butter and then fold into 1½ cups whipped topping. Proceed to layering.)
3) Layer the graham crackers
Line your 9×13 pan with a single layer of graham cracker sheets, placing them side-by-side. Break crackers to fit as needed. If your crackers are very dry, you can quickly run a clean damp cloth over the bottom of the pan (or spray a little water) so the bottom row gets slightly softer — but don’t soak them.
4) Add the first peanut-butter layer
Spread about one-third of the peanut butter filling over the first graham cracker layer in an even layer (about ¾–1 cup per layer depending on your thickness preference). Smooth with an offset spatula to the edges.
Please Head On keep Reading (>)


No Responses Yet