
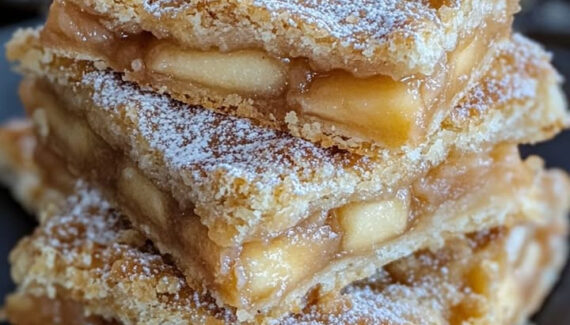
Pineapple Dream Dessert: A Light, Creamy No-Bake Delight
If you’re looking for a dessert that perfectly balances sweetness, freshness, and a melt-in-your-mouth texture, the Pineapple Dream Dessert is exactly what you need. This no-bake treat combines a buttery crust, a luscious cream cheese layer, and a fluffy pineapple topping to create a refreshing dessert that’s perfect for warm days, family gatherings, or whenever you want something easy yet impressive.
What makes this dessert truly special is its simplicity. With just a handful of ingredients and minimal effort, you can create a layered masterpiece that tastes like it came straight from a bakery.
Ingredients You’ll Need
For the crust:
- 2 cups graham cracker crumbs
- ½ cup melted butter
- 2 tablespoons sugar
For the cream cheese layer:
- 8 oz (225g) cream cheese, softened
- 1 cup powdered sugar
- 1 teaspoon vanilla extract
- 1 cup whipped topping (like Cool Whip)
For the pineapple layer:
- 1 can (20 oz) crushed pineapple, well drained
- 1 cup whipped topping
Optional topping:
- Extra whipped topping
- Chopped nuts (like pecans or walnuts)
- Maraschino cherries
Step-by-Step Method
Step 1: Prepare the Crust
Start by creating a firm, flavorful base.
- In a mixing bowl, combine the graham cracker crumbs, melted butter, and sugar.
- Stir until the mixture resembles wet sand.
- Press the mixture evenly into the bottom of a baking dish (8×8 or 9×9 inches works best).
- Use the back of a spoon or the bottom of a glass to pack it down tightly.
Place the crust in the refrigerator for about 20–30 minutes to set while you prepare the filling.
Step 2: Make the Cream Cheese Layer
This layer adds richness and balances the tangy pineapple.
- In a large bowl, beat the softened cream cheese until smooth and creamy.
- Add powdered sugar and vanilla extract, then mix until fully combined.
- Gently fold in the whipped topping until the mixture becomes light and fluffy.
Once ready, spread this layer evenly over the chilled crust. Smooth it out with a spatula to create an even surface.
Please Head On keep on Reading (>)


No Responses Yet