Step 4: Cook the Jam Slowly
Transfer the strawberry mixture to a large, heavy-bottomed saucepan. Place over medium heat and bring to a gentle boil, stirring occasionally to prevent sticking or burning.
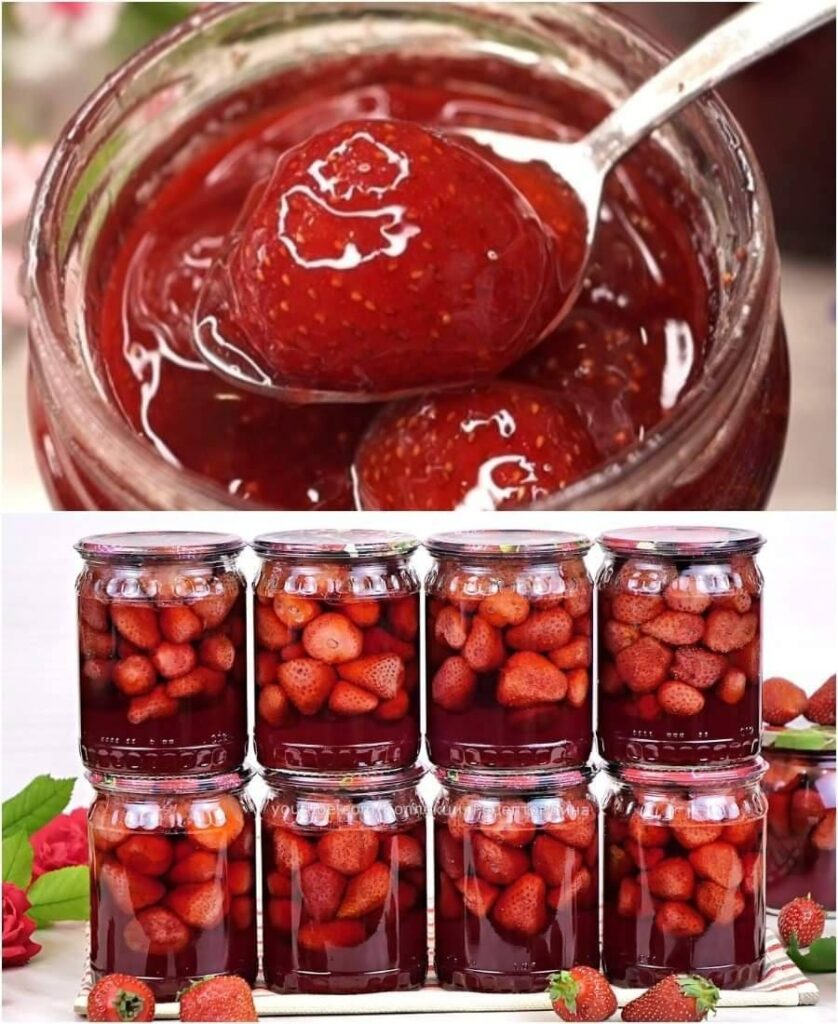
Once boiling, reduce the heat to maintain a steady simmer. Continue to cook for about 20 to 30 minutes, stirring frequently. The strawberries will break down and the mixture will thicken gradually. You’ll notice the color deepening to a rich red and the texture becoming syrupy.
Step 5: Check for Jam Setting Point
To test if the jam is ready, perform the “plate test”: Place a small spoonful of jam on a chilled plate and let it cool for a minute. Push the jam with your finger — if it wrinkles and holds its shape, it’s done. If it’s still too runny, continue simmering for a few more minutes and test again.
Step 6: Optional Vanilla Addition
If you like, stir in 1 teaspoon of vanilla extract right at the end of cooking to add a lovely, warm aroma and subtle flavor complexity. This step is optional but highly recommended for a unique twist.
Step 7: Sterilize and Fill Jars
While the jam is finishing, sterilize your jars by boiling them in hot water for 10 minutes or running them through a hot dishwasher cycle.
Pour the hot jam carefully into the sterilized jars, leaving about 1/4 inch of headspace. Wipe the rims clean and seal with lids immediately.
Step 8: Cool and Store
Let the jars cool completely at room temperature. The jam will continue to thicken slightly as it cools. Store in the refrigerator for up to 3 weeks or process in a boiling water bath for 10 minutes to preserve at room temperature for up to one year.
Why This Recipe Stands Out
- Pure Strawberry Flavor: No pectin powders or gelatin means the flavor of the fruit is the star.
- Natural Thickening: The magic of maceration, lemon juice, and slow simmering creates perfect consistency.
- Simple Ingredients: Just strawberries, sugar, and lemon juice — nothing artificial.
- Flexible: You can adjust sugar levels or add vanilla for personalization.
Tips for Best Results
- Use the freshest, ripest strawberries you can find — they contain more natural pectin and sweetness.
- Avoid rushing the maceration step — it’s key for juicy, flavorful jam.
- Stir frequently while cooking to prevent burning on the bottom.
- Don’t skip the lemon juice; it’s essential for natural thickening.
Final Thoughts
This strawberry jam recipe is a delightful celebration of the fruit’s natural sweetness and aroma, made entirely from scratch with no thickeners or additives. It’s ideal for spreading on fresh bread, dolloping on yogurt, or using as a topping for desserts. Once you taste the vibrant, full-bodied flavor and perfect texture, this will become your go-to recipe for homemade strawberry jam — just like it is for me.
Enjoy the pure taste of summer in a jar!
Would you like me to help with a printable version or storage tips?


No Responses Yet