
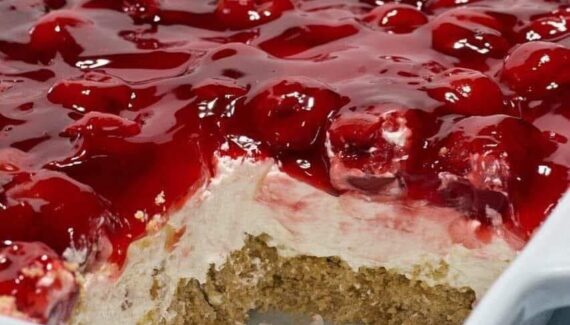
🍒 Cherry Pie Bars: The Perfect Portion of Summer Comfort
There’s something undeniably nostalgic about cherry pie—the ruby-red filling, the buttery crust, and that perfect balance of sweet and tart. Cherry Pie Bars take everything you love about the classic dessert and turn it into an easy-to-serve, shareable treat that’s ideal for summer gatherings, picnics, or just a cozy afternoon at home. No rolling pins, no pie plates—just pure comfort baked into tidy squares.
These bars deliver all the flavor of a homemade cherry pie with far less effort, making them perfect for both beginner bakers and seasoned pros who want maximum reward with minimal fuss.
Why Cherry Pie Bars Are a Summer Favorite
- Perfectly portioned: Easy to slice, stack, and serve
- Less mess than pie: No runny slices or tricky serving
- Great for crowds: Ideal for potlucks, barbecues, and bake sales
- Classic flavor: Timeless cherry filling with a soft, buttery base
Ingredients You’ll Need
For the Crust & Topping:
- Unsalted butter, softened
- Granulated sugar
- Eggs
- Vanilla extract
- All-purpose flour
- Baking powder
- Salt
For the Filling:
- Cherry pie filling (homemade or store-bought)
Optional Glaze:
- Powdered sugar
- Milk or cream
- A splash of vanilla extract
Step-by-Step Method to Make Cherry Pie Bars
Step 1: Prepare the Baking Pan
Preheat your oven to 350°F (175°C). Line a rectangular baking pan with parchment paper or lightly grease it. This helps prevent sticking and makes lifting the bars out effortless.
Step 2: Cream the Butter and Sugar
In a large mixing bowl, beat the softened butter and granulated sugar together until light, fluffy, and pale in color. This step is key for creating a tender, bakery-style crust.
Please Head On keep on Reading (>)


No Responses Yet