Boston Cream Cupcakes: A Step-by-Step Guide to Making the Classic Dessert in Cupcake Form
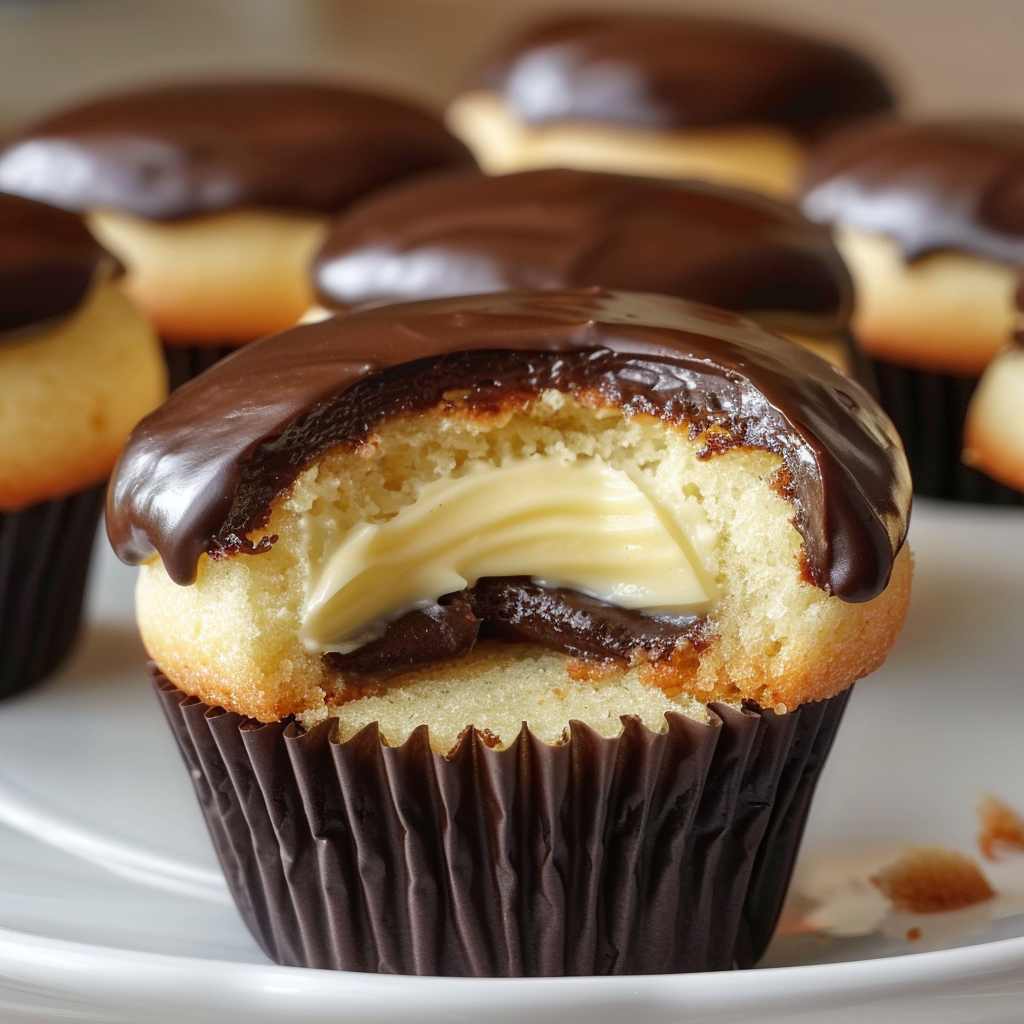
Boston Cream Cupcakes are a delightful twist on the famous Boston cream pie, transforming the traditional combination of fluffy sponge cake, smooth pastry cream, and rich chocolate glaze into a convenient handheld dessert. These cupcakes bring together three irresistible textures: a soft vanilla cupcake base, a creamy custard filling hidden inside, and a glossy chocolate topping that adds the perfect finishing touch.
Although the original Boston cream pie was created in the 19th century, the cupcake version has become a popular choice for birthdays, celebrations, bake sales, and everyday treats. The beauty of these cupcakes is that they look elegant but are surprisingly simple to prepare at home. With a little patience and attention to each layer, you can create bakery-style Boston Cream Cupcakes in your own kitchen.
What Makes Boston Cream Cupcakes Special?
The magic of a Boston Cream Cupcake comes from the contrast between its components.
The cupcake itself should be light and tender, with a delicate vanilla flavor that allows the filling and topping to shine. The pastry cream provides a rich, creamy center that melts in your mouth, while the chocolate glaze adds a slightly bitter sweetness that balances the dessert.
Unlike ordinary cupcakes that rely only on frosting, Boston Cream Cupcakes hide their most exciting element inside. Cutting into one reveals a surprise layer of homemade cream that makes every bite feel special.
Ingredients You Will Need
For the Vanilla Cupcakes
- 1 ½ cups all-purpose flour
- 1 ½ teaspoons baking powder
- ¼ teaspoon salt
- ½ cup unsalted butter, softened
- ¾ cup granulated sugar
- 2 large eggs, room temperature
- 2 teaspoons vanilla extract
- ½ cup whole milk
- ¼ cup sour cream or plain yogurt
For the Pastry Cream Filling
- 2 cups whole milk
- ½ cup granulated sugar
- 4 large egg yolks
- 3 tablespoons cornstarch
- 2 teaspoons vanilla extract
- 2 tablespoons unsalted butter
For the Chocolate Glaze
- ¾ cup semi-sweet chocolate chips
- ½ cup heavy cream
- 1 tablespoon butter
- 1 teaspoon vanilla extract (optional)
Step-by-Step Instructions
Step 1: Prepare the Pastry Cream Filling
The pastry cream needs time to cool, so it is best to prepare it first.
Begin by heating the milk in a saucepan over medium heat until it becomes warm but does not boil. While the milk is heating, whisk the egg yolks, sugar, and cornstarch together in a separate bowl until the mixture becomes smooth and slightly lighter in color.
Slowly pour a small amount of the warm milk into the egg mixture while whisking continuously. This process, called tempering, prevents the eggs from scrambling. Once combined, pour everything back into the saucepan.
Cook the mixture over medium heat while stirring constantly. After a few minutes, the cream will begin to thicken into a smooth custard. Continue stirring for another minute to ensure the cornstarch is fully cooked.
Remove the saucepan from the heat and add the vanilla extract and butter. Stir until the butter melts completely.
Transfer the pastry cream to a bowl and cover the surface directly with plastic wrap to prevent a skin from forming. Refrigerate until completely chilled.
Step 2: Make the Vanilla Cupcake Batter
Preheat your oven to 350°F (175°C) and line a cupcake pan with paper liners.
In a medium bowl, combine the flour, baking powder, and salt. Set this mixture aside.
In a large mixing bowl, beat the softened butter and sugar together until the mixture becomes light and fluffy. This step is important because it creates air pockets that help the cupcakes rise and stay soft.
Add the eggs one at a time, mixing well after each addition. Stir in the vanilla extract.
Add half of the dry ingredients to the butter mixture, followed by the milk and sour cream. Mix gently, then add the remaining flour mixture. Avoid overmixing, as this can make the cupcakes dense.
The finished batter should be smooth and creamy.
Please Head On keep on Reading (>)






No Responses Yet