Step 3: Bake the Cupcakes
Divide the batter evenly among the cupcake liners, filling each one about two-thirds full.
Bake for approximately 18–22 minutes, or until a toothpick inserted into the center comes out clean.
Allow the cupcakes to cool in the pan for about five minutes, then transfer them to a wire rack to cool completely.
It is important that the cupcakes are completely cool before adding the filling. Warm cupcakes can cause the pastry cream to melt and lose its texture.
Step 4: Fill the Cupcakes with Pastry Cream
Once the cupcakes have cooled, create a small opening in the center of each cupcake.
You can use a cupcake corer, a small knife, or the back of a piping tip to remove a small section from the middle.
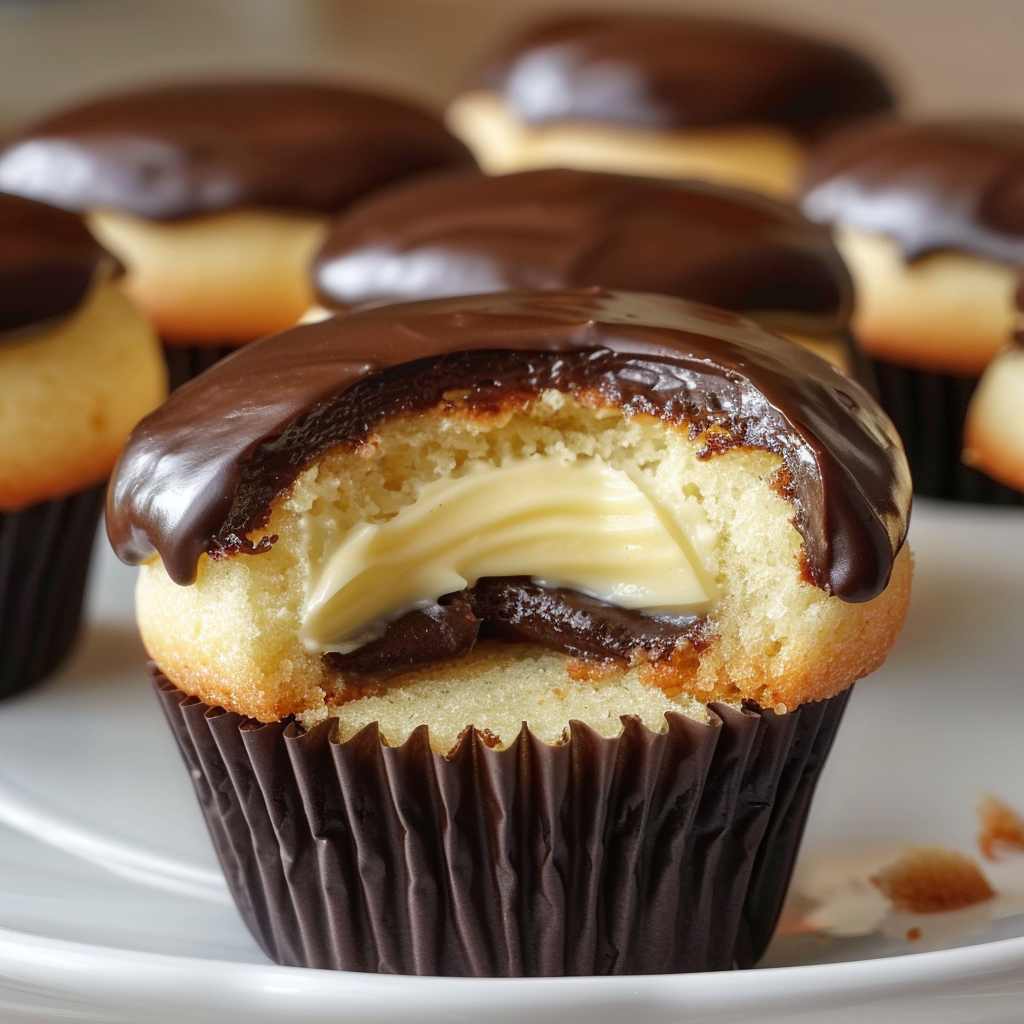
Fill a piping bag with the chilled pastry cream and pipe the filling into each cupcake until the center is generously filled.
Replace the removed cupcake piece if desired, or simply leave the cream slightly visible for a homemade bakery-style appearance.
Step 5: Prepare the Chocolate Glaze
Place the chocolate chips in a heatproof bowl.
Warm the heavy cream in a small saucepan until it begins to simmer. Pour the hot cream over the chocolate and allow it to sit for one minute.
Stir slowly until the chocolate melts and the mixture becomes smooth and shiny. Add butter and vanilla extract for extra richness.
Let the glaze cool slightly until it thickens enough to coat the cupcakes without running too much.
Step 6: Decorate the Cupcakes
Dip the top of each filled cupcake into the chocolate glaze or spoon the chocolate over the surface.
Allow the glaze to set for several minutes before serving.
For a more elegant presentation, you can add a small swirl of whipped cream, chocolate shavings, or a light dusting of powdered sugar. However, the classic Boston Cream Cupcake is beautiful with just its simple chocolate topping.
Tips for Perfect Boston Cream Cupcakes
Use Room Temperature Ingredients
Room temperature butter, eggs, and milk combine more easily and create a smoother batter. This helps produce soft and evenly baked cupcakes.
Do Not Rush the Pastry Cream
The filling is the heart of this dessert. Cooking it slowly while stirring constantly prevents lumps and creates a silky texture.
Avoid Overfilling the Cupcakes
A generous amount of cream is delicious, but too much filling can cause the cupcakes to become difficult to handle. Fill them until the cream reaches the top of the opening.
Chill Before Serving
Boston Cream Cupcakes taste even better after resting in the refrigerator for a short time. The flavors blend together, and the pastry cream becomes perfectly firm.
How to Store Boston Cream Cupcakes
Because these cupcakes contain a dairy-based filling, they should be stored in the refrigerator. Place them in an airtight container and enjoy them within 3–4 days for the best flavor and texture.
Before serving, allow them to sit at room temperature for about 10–15 minutes so the cupcake becomes soft again.
Final Thoughts
Boston Cream Cupcakes are proof that classic desserts can be reinvented into something modern and practical without losing their original charm. Each cupcake combines the comforting flavor of vanilla cake, the richness of homemade pastry cream, and the elegance of chocolate glaze.
Whether you are making them for a special celebration or simply craving a homemade dessert, these cupcakes offer a bakery-quality experience with every bite. The process may involve a few steps, but the result is a dessert that feels truly special and is well worth the effort.





No Responses Yet