
Step 4: Make the Garlic Butter Base
In the same skillet, reduce the heat to medium. Add two tablespoons of butter.
Once the butter melts, add the minced garlic. Stir for about 30 seconds to 1 minute. Do not let the garlic burn, because burnt garlic can make the sauce taste bitter.
At this stage, the pan will already have flavor from the cooked chicken. The garlic and butter will pick up those browned bits and create a richer sauce.
Step 5: Build the Creamy Sauce
Pour the chicken broth into the skillet and stir well. Scrape the bottom of the pan gently to lift any browned bits from the chicken.
Add the heavy cream and mix until smooth. Let the sauce simmer gently for 2–3 minutes. Do not boil it too hard, because high heat can cause the cream to separate.
Now add the parmesan cheese slowly while stirring. The cheese will melt into the cream and make the sauce thicker and more flavorful.
For a cheesier sauce, add mozzarella cheese as well. Stir until the sauce becomes creamy and smooth.
Step 6: Season the Sauce
Add Italian seasoning, black pepper, and a small amount of salt. Be careful with the salt because parmesan cheese is already salty.
For a slight spicy flavor, add red chili flakes. This is optional, but it balances the richness of the cream nicely.
Let the sauce simmer for another 2 minutes until it thickens slightly.
Step 7: Add the Chicken Back
Return the cooked chicken pieces to the skillet. Stir gently so the chicken becomes fully coated in the creamy garlic parmesan sauce.
Let the chicken simmer in the sauce for 2–3 minutes. This helps the chicken absorb the creamy flavor and keeps it moist.
At this point, the sauce should look thick, glossy, and rich.
Step 8: Combine with Pasta
Add the cooked pasta to the skillet. Toss everything together until the pasta is fully covered with the sauce.
If the sauce feels too thick, add a small amount of the reserved pasta water. Add it little by little until the sauce reaches your preferred consistency.
The pasta should be creamy, not dry. Every piece should be coated with sauce.
Step 9: Garnish and Serve
Turn off the heat and sprinkle chopped parsley over the pasta. The parsley adds freshness and gives the dish a beautiful finished look.
Serve the pasta hot in a bowl or deep plate. Add extra parmesan cheese on top if desired.
Tips for the Best Creamy Chicken Pasta
Use freshly grated parmesan if possible. It melts better and gives the sauce a smoother texture.
Do not overcook the chicken. Once it is golden and cooked through, remove it from the pan to keep it juicy.
Cook the sauce on medium or low heat. Cream sauces can split if the heat is too high.
Save pasta water before draining. It is very useful for adjusting the sauce without making it watery.
Add cheese slowly while stirring. This helps prevent clumps and creates a smooth sauce.
What to Serve with It
This creamy garlic parmesan chicken pasta goes well with garlic bread, a simple green salad, roasted vegetables, steamed broccoli, or sautéed mushrooms.
For a heavier meal, serve it with extra cheese and bread. For a lighter meal, serve it with salad or vegetables on the side.
Storage and Reheating
Store leftovers in an airtight container in the refrigerator for up to 3 days.
To reheat, place the pasta in a pan over low heat. Add a splash of milk, cream, or chicken broth to bring the sauce back to life. Stir gently until warm.
Avoid reheating on very high heat because the sauce may become oily or separate.
Final Thoughts
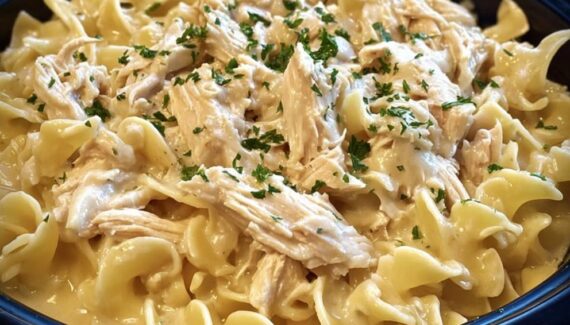
Creamy Garlic Parmesan Chicken Pasta is a delicious comfort dish made with simple ingredients but full of flavor. The golden chicken, creamy garlic sauce, parmesan cheese, and soft pasta create a rich and satisfying meal that feels special without being difficult.
It is easy enough for a weeknight dinner but tasty enough to serve to guests. With the right balance of garlic, cream, cheese, and herbs, this dish can easily become a favorite homemade pasta recipe.





No Responses Yet