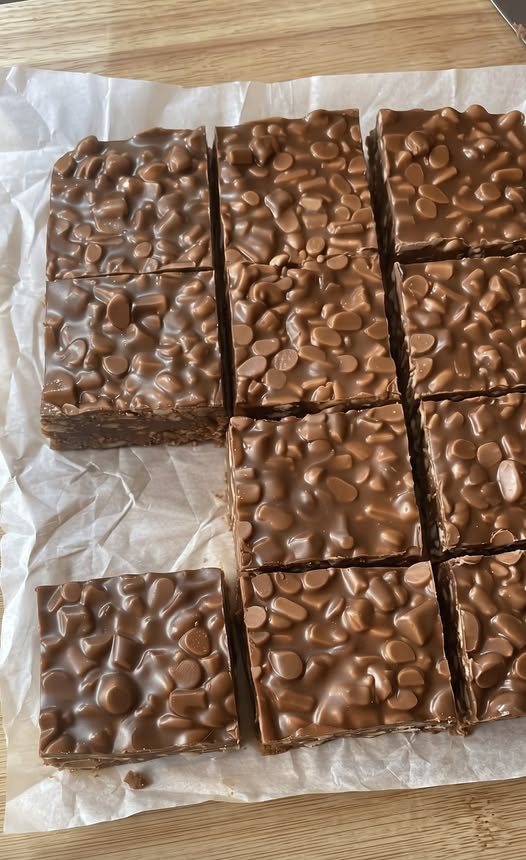
Step 4: Fold in the Crispy Rice Cereal
Pour the crispy rice cereal into the chocolate mixture.
Using a silicone spatula, gently fold the cereal into the chocolate until every piece is evenly coated.
Take your time with this step. Stir gently rather than crushing the cereal, because keeping those little crispy pieces intact is what gives homemade crunch bars their wonderful texture.
Make sure there are no large sections of plain cereal or pools of chocolate left at the bottom of the bowl.
Step 5: Transfer the Mixture to the Pan
Pour the chocolate and cereal mixture into your prepared baking pan.
Spread it evenly using a spatula, gently pressing the mixture into the corners.
Try not to press too firmly. A gentle, even layer will help preserve the airy crunch of the cereal while ensuring the bars hold together when sliced.
For a slightly more decorative finish, smooth the surface with the back of a spoon.
Step 6: Refrigerate Until Firm
Place the pan in the refrigerator for approximately 1 to 2 hours, or until the chocolate mixture is completely firm.
If you’re short on time, you can place the pan in the freezer for approximately 25 to 35 minutes.
The bars should feel firm to the touch before you remove them from the pan. Proper chilling is important because it allows the chocolate to set and helps the bars maintain their shape when cut.
Step 7: Slice Into Bars
Once the mixture has set, use the parchment paper overhang to lift it out of the pan.
Place it on a cutting board and allow it to sit at room temperature for a few minutes if it feels too hard to cut.
Using a sharp knife, slice the mixture into squares or rectangular bars, depending on your preferred size.
For cleaner cuts, wipe the knife with a warm, dry towel between slices.
Your homemade crunch bars are now ready to enjoy!
Tips for Making the Best Homemade Crunch Bars
A few simple tips can make a big difference in the final texture and flavor.
-
Choose good-quality chocolate: Since chocolate is the main ingredient, using a brand you enjoy eating will give you the best flavor.
-
Don’t overheat the chocolate: Melt it slowly and stir frequently to keep it smooth.
-
Keep the cereal crispy: Fold it gently into the chocolate instead of stirring aggressively.
-
Avoid excess moisture: Make sure your bowl and utensils are completely dry before melting the chocolate.
-
Don’t skip the chilling time: The bars need enough time to become firm so they won’t fall apart when sliced.
-
Use parchment paper: It makes removing and cutting the bars much easier.
Delicious Variations to Try
One of the best things about homemade crunch bars is how easy they are to customize. Once you’ve mastered the basic recipe, try one of these delicious variations.
1. Dark Chocolate Crunch Bars
Replace the semi-sweet chocolate chips with dark chocolate chips for a deeper, less sweet flavor. This version is especially delicious with a tiny sprinkle of flaky sea salt on top.
2. Extra Peanut Butter Crunch Bars
Increase the peanut butter to 3/4 cup for a stronger nutty flavor and a creamier texture. You can also drizzle melted peanut butter over the finished bars before chilling.
3. Almond Chocolate Crunch Bars
Add 1/3 cup of finely chopped roasted almonds to the cereal mixture. The almonds provide an additional layer of crunch and a lovely toasted flavor.
4. White Chocolate Crunch Bars
Use white chocolate chips instead of semi-sweet chocolate and follow the same preparation method. You can add dried cranberries or chopped pistachios for extra flavor.
5. Salted Chocolate Crunch Bars
Sprinkle a little flaky sea salt over the chocolate mixture before refrigerating. The contrast between sweet chocolate and salt creates a delicious balance.
How to Store Homemade Crunch Bars
Proper storage helps maintain the texture and freshness of your homemade treats.
-
Refrigerator: Store the bars in an airtight container for up to 2 weeks. Separate layers with parchment paper to prevent sticking.
-
Room temperature: If your kitchen is cool, you can keep them in an airtight container for a few days. However, warmer temperatures may cause the chocolate to soften.
-
Freezer: Place the bars in a freezer-safe container with parchment paper between layers. Freeze for up to 2 months for the best quality.
When you’re ready to enjoy frozen bars, let them thaw in the refrigerator or at room temperature for a few minutes before serving.
Frequently Asked Questions
1. Can I make homemade crunch bars without peanut butter?
Absolutely! Simply leave out the peanut butter and use an additional 2 tablespoons of coconut oil if needed to help maintain a smooth chocolate mixture. The result will have a more traditional chocolate flavor.
2. What can I use instead of crispy rice cereal?
You can experiment with crushed cornflakes, puffed rice, or other crispy breakfast cereals. Keep in mind that the texture may vary depending on the cereal you choose.
3. Why are my homemade crunch bars falling apart?
This usually happens when there isn’t enough chocolate to hold the cereal together or the mixture hasn’t chilled long enough. Make sure the cereal is evenly coated and allow the bars to become completely firm before slicing.
4. Can I use milk chocolate instead of semi-sweet chocolate?
Yes! Milk chocolate works wonderfully if you prefer sweeter bars. Since it is naturally sweeter, the finished treats will have a flavor closer to classic candy bars.
5. Can I make these bars ahead of time?
Definitely. These bars are excellent for preparing ahead. Make them a day or two before serving, store them in an airtight container in the refrigerator, and cut them into portions when needed.
6. How do I get perfectly clean slices?
Allow the bars to sit for a few minutes after removing them from the refrigerator. Use a sharp knife warmed under hot water and thoroughly dried before cutting. Wipe the blade between slices for neat edges.
Final Thoughts
Homemade Crunch Bars are proof that delicious desserts don’t have to be complicated. With just a few simple ingredients and a little refrigeration time, you can create a chocolatey, crispy treat that tastes like something straight from your favorite candy shop.
Whether you enjoy them with a cup of coffee, pack them as an afternoon snack, or serve them as part of a homemade dessert platter, these bars are sure to become a favorite. The combination of smooth chocolate, creamy peanut butter, and crispy rice cereal makes every bite satisfying.
Make a batch, keep a few in the refrigerator, and you’ll always have a delicious homemade chocolate treat ready whenever a sweet craving strikes!







No Responses Yet