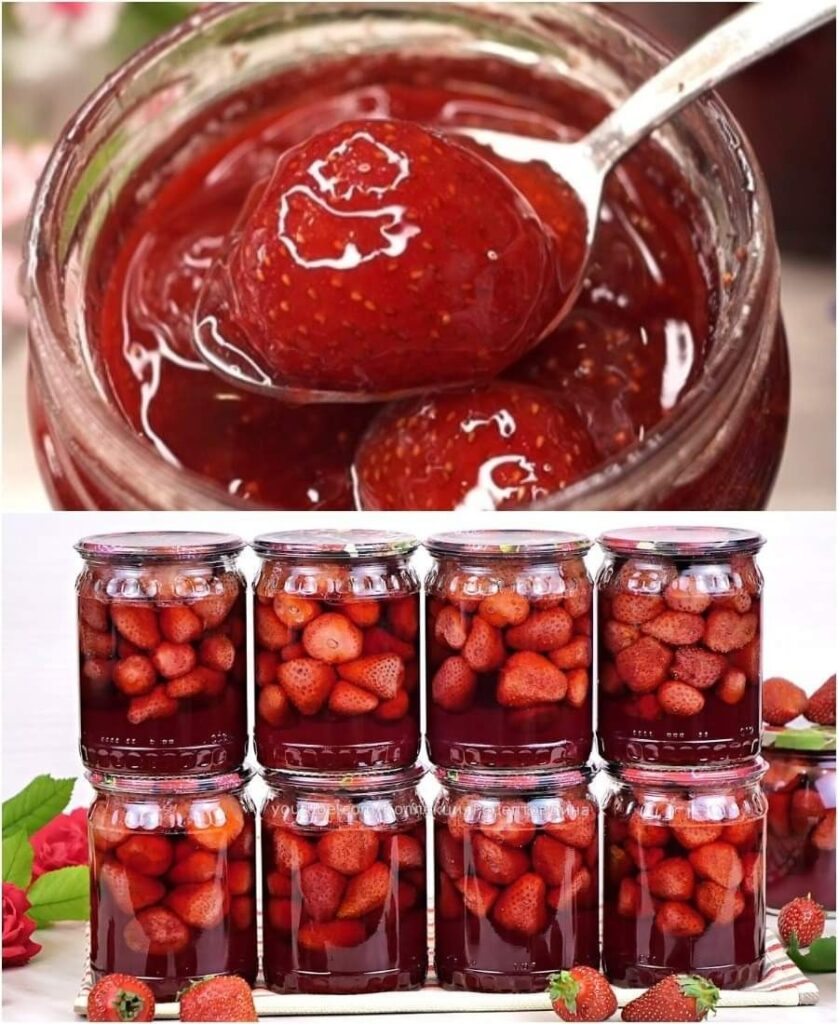
“I Make Strawberry Jam Only According to This Recipe – I Don’t Look for Others”
The Taste and Smell of Strawberries Are Preserved. And Without Any Thickener, It’s Still Thick.
When strawberry season rolls around, there’s one ritual that signals the true arrival of summer in our kitchen: making strawberry jam. Over the years, I’ve tried many versions – some with pectin, others with lemon juice or cornstarch. But none of them compare to this old-fashioned, no-thickener recipe. It’s simple, pure, and, most importantly, it keeps the flavor and aroma of fresh strawberries fully intact. This jam has just the right amount of sweetness, a natural thick consistency, and no artificial thickeners. It’s the only recipe I use – and after trying it, you may never look for another either.
🍓 Why This Recipe Works So Well
What makes this jam different? Three things:
- Slow cooking: Time is the thickener here. Gentle, patient simmering allows the natural pectins in strawberries to do their job.
- No overcooking: Preserving that rich, fruity aroma means not boiling the strawberries to death. It’s about respecting the fruit.
- Sugar balance: The right sugar-to-berry ratio creates a smooth, thick texture and also works as a preservative.
🥄 Ingredients (Simple and Honest)
- 1 kg fresh strawberries (firm, ripe, and fragrant)
- 600–700 g granulated sugar (adjust to taste and berry sweetness)
- Juice of half a lemon (optional, but helps preserve color and flavor)
That’s it – no pectin, no cornstarch, no gelling agents. Just real strawberries and sugar.
👩🍳 Step-by-Step: How to Make the Best Strawberry Jam
Step 1: Prepare the Strawberries
- Rinse the strawberries thoroughly under cold water and drain.
- Remove the stems and slice the strawberries into halves or quarters depending on their size.
- Place the cut strawberries in a large bowl and layer them with sugar.
Step 2: Let the Strawberries Macerate
- Cover the bowl and let the strawberries sit for 4 to 6 hours, or overnight in the fridge.
- The sugar draws out the juice from the berries, creating a natural syrup. This step is key to preserving the bright flavor of the fruit.
Step 3: Start Cooking
- Pour the strawberries and all their syrup into a wide, heavy-bottomed pan or pot.
- Cook over medium heat until the mixture comes to a gentle boil.
- Stir often to prevent sticking or burning at the bottom.
Step 4: Skim the Foam
- As the jam starts to bubble, you’ll see white foam forming on top. Skim this off with a spoon.
- This keeps the jam clear and improves its shelf life.
Step 5: Simmer and Reduce
- Turn the heat to low and let the jam simmer slowly for about 45 minutes to 1 hour.
- Stir occasionally. As the liquid reduces, the jam will begin to thicken naturally.
- You’ll notice the mixture becoming glossy and syrupy.
Please Head On keep on Reading (>) for the FULL ARTICLE:


No Responses Yet