
Step 5: Add Cheese to the Sauce
Stir 1 cup of shredded cheddar cheese into the creamy sauce.
You can also add mozzarella if you want a stretchier, meltier texture.
Mix until the cheese is evenly distributed.
This sauce will coat the pierogies while baking and keep the casserole moist and rich.
Step 6: Arrange the First Layer
Place half of the frozen pierogies in the prepared baking dish.
You do not need to thaw them first. They will cook in the oven while absorbing the creamy sauce.
Spread half of the sautéed onions over the pierogies.
Sprinkle some of the crispy bacon on top.
Step 7: Add the Sauce
Spoon half of the creamy cheese sauce over the pierogi layer.
Spread it gently with a spatula so it covers the pierogies as evenly as possible.
Do not worry if the sauce does not cover every piece perfectly. It will melt and spread as it bakes.
Step 8: Build the Second Layer
Add the remaining pierogies over the first layer.
Top with the rest of the sautéed onions, more bacon, and the remaining creamy sauce.
Spread the sauce across the top.
Sprinkle extra cheddar cheese over everything.
This final cheese layer will melt into a golden, bubbly topping.
Step 9: Bake the Casserole
Cover the baking dish with foil.
Bake for 25 minutes.
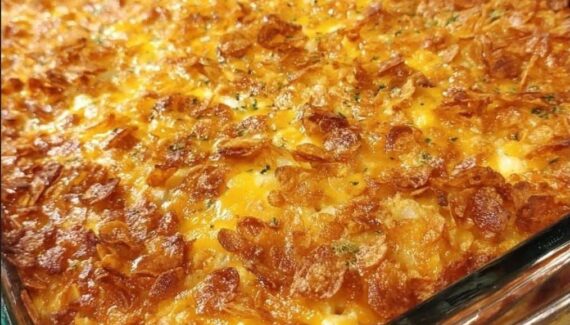
After 25 minutes, remove the foil and bake for another 12 to 15 minutes, or until the cheese is melted, bubbly, and lightly golden on top.
If you want a darker cheese topping, broil the casserole for 1 to 2 minutes at the end. Watch closely because cheese can brown quickly.
Step 10: Let It Rest
Remove the casserole from the oven and let it rest for 5 to 10 minutes before serving.
This helps the sauce thicken slightly and makes the casserole easier to scoop.
If you serve it immediately, the sauce may be very loose, but it will settle as it cools a little.
Step 11: Garnish and Serve
Sprinkle the top with chopped green onions, extra bacon, and fresh parsley.
Serve warm with a spoonful of sour cream on the side.
This casserole is rich and filling, so it pairs well with a simple green salad, roasted vegetables, coleslaw, steamed broccoli, or pickles.
Tips for the Best Loaded Pierogi Casserole
Use potato and cheese pierogies for the most classic flavor.
Do not over-salt the sauce before adding bacon and cheese. Both are already salty.
Cover the casserole during the first part of baking so the frozen pierogies heat through properly.
Use freshly shredded cheese if possible. It melts smoother than pre-shredded cheese.
Let the casserole rest before serving so the sauce becomes thicker and creamier.
Flavor Variations
For a spicy version, add jalapeños, chili flakes, or pepper jack cheese.
For a meatier version, add sliced smoked sausage, ham, or shredded chicken.
For a loaded baked potato flavor, add extra bacon, green onions, cheddar, and sour cream.
For a mushroom version, sauté mushrooms with the onions before layering.
For a lighter version, use Greek yogurt instead of sour cream and reduce the cheese slightly.
Storage and Reheating
Store leftovers in an airtight container in the refrigerator for up to 4 days.
To reheat, place a portion in the microwave or warm the casserole in the oven at 350°F / 175°C until heated through.
Add a splash of milk or cream before reheating if the sauce has become too thick.
This casserole can also be assembled ahead of time. Cover it tightly and refrigerate for up to 24 hours before baking. Add 10 extra minutes to the covered baking time if baking straight from the refrigerator.
Final Thoughts
Loaded Pierogi Casserole Bake is a warm, creamy, cheesy dish that turns simple frozen pierogies into a full comfort-food meal. The layers of tender pierogies, sour cream cheese sauce, crispy bacon, sweet onions, and melted cheddar make it rich, hearty, and satisfying.
It is easy to prepare, family-friendly, and perfect for anyone who loves the flavors of pierogies and loaded baked potatoes in one delicious casserole.




No Responses Yet