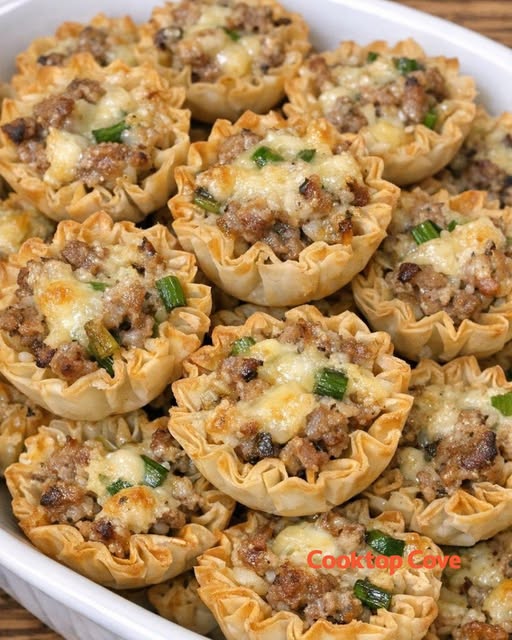
Step 4: Shape the Phyllo Cups
Lightly grease your muffin tin with butter or nonstick cooking spray.
Take one square of prepared phyllo dough and gently press it into a muffin cavity.
Allow the corners to extend upward naturally, creating a small cup shape.
Repeat with the remaining squares until all the muffin cavities are filled.
Be gentle when pressing the dough into the pan because the delicate layers can tear easily.
Step 5: Bake Until Golden and Crispy
Transfer the muffin tin to your preheated oven.
Bake for approximately 8–12 minutes, or until the phyllo cups become lightly golden, crisp, and firm.
Keep an eye on them during the final few minutes because phyllo dough can brown quickly.
Once baked, remove the pan from the oven and allow the cups to cool for a few minutes before carefully transferring them to a wire rack.
Let them cool completely before adding the filling.
Step 6: Prepare the Creamy Filling
While the phyllo cups are cooling, prepare the filling.
Place the softened cream cheese in a mixing bowl and beat until smooth and creamy.
Add the honey and continue mixing until everything is thoroughly combined.
The finished mixture should be smooth, fluffy, and easy to spoon into the cups.
Taste the filling and add a little extra honey if you prefer a sweeter flavor.
Step 7: Fill the Crispy Phyllo Cups
Once the phyllo cups have cooled completely, spoon a small amount of cream cheese filling into each one.
Avoid overfilling them because the delicate pastry should remain visible around the edges.
For a more polished presentation, transfer the filling into a piping bag and pipe it neatly into each cup.
Arrange the finished phyllo cups on a serving platter and serve immediately for the best contrast between the creamy filling and crispy pastry.
Tips for Making Perfect Crispy Phyllo Cups
A few simple techniques can make a big difference in the final result.
Keep the phyllo dough covered: Phyllo dries out very quickly. Always cover unused sheets with a slightly damp towel while working.
Don’t skip the butter: Brushing each layer with melted butter helps create the beautiful golden color and crisp texture.
Handle the dough gently: The sheets are extremely thin, so avoid pulling or pressing too hard when separating and shaping them.
Allow the cups to cool: Never add the cream cheese filling while the pastry is still warm. The heat can soften the filling and make the cups lose their crispness.
Avoid overfilling: A small amount of filling is enough to make each bite delicious without overwhelming the delicate pastry.
Watch the baking time: Every oven is slightly different, so check the cups frequently toward the end of baking.
Delicious Variations to Try
One of the best things about phyllo cups is how easily you can change their flavor.
-
Berry Phyllo Cups: Add fresh strawberries, blueberries, or raspberries on top of the cream cheese filling for a refreshing fruity finish.
-
Chocolate Phyllo Cups: Mix a little melted chocolate into the cream cheese filling for a richer dessert.
-
Lemon Honey Cups: Add a teaspoon of fresh lemon zest to the filling for a bright, citrusy flavor.
-
Nutty Phyllo Cups: Sprinkle chopped pecans, walnuts, or almonds over the finished cups for extra crunch.
-
Savory Phyllo Cups: Replace the sweet filling with a mixture of cream cheese, herbs, and shredded cheese for a delicious appetizer.
What to Serve With Phyllo Cups
These little treats are versatile enough to serve on many different occasions.
For a dessert platter, pair them with fresh fruit, chocolate-covered strawberries, cookies, or small brownies.
If you’re serving them as appetizers, arrange them alongside cheese, crackers, olives, fresh vegetables, and other bite-sized snacks.
They also make a lovely addition to afternoon tea, brunch tables, holiday dessert spreads, and birthday celebrations.
How to Store Leftovers
Proper storage helps maintain the quality of your homemade phyllo cups.
Refrigerator: Place filled phyllo cups in a single layer inside an airtight container and refrigerate for up to 2 days. Keep in mind that the pastry may soften as it absorbs moisture from the filling.
Unfilled cups: Store completely cooled, baked phyllo shells in an airtight container at room temperature for up to 3 days, away from moisture.
Freezing: You can freeze the baked, unfilled phyllo cups in a freezer-safe container for up to 1 month. Thaw them at room temperature and briefly re-crisp them in a 300°F (150°C) oven before filling.
For the best results, prepare the pastry shells and filling separately, then assemble shortly before serving.
Frequently Asked Questions
1. Can I make phyllo cups ahead of time?
Yes! You can bake the phyllo shells a day or two in advance and store them in an airtight container. Prepare the filling separately and assemble the cups shortly before serving.
2. Why did my phyllo dough tear?
Phyllo dough is naturally delicate and often tears when it becomes too dry or is handled too roughly. Keep unused sheets covered with a slightly damp towel and separate them slowly.
3. How do I keep phyllo cups crispy?
Allow the shells to cool completely before filling them. Avoid adding wet fillings too early, and assemble them as close to serving time as possible.
4. Can I use store-bought mini phyllo shells?
Absolutely! Store-bought mini phyllo shells are a convenient alternative if you want to save preparation time. Simply bake them according to the package directions if needed, allow them to cool, and add your filling.
5. Can I make these phyllo cups savory instead of sweet?
Yes! Replace the honey cream cheese filling with savory ingredients such as feta cheese, spinach, herbs, or shredded cheddar. Phyllo dough works beautifully with both sweet and savory flavors.
6. How can I tell when the phyllo cups are fully baked?
They should look golden brown, feel crisp, and hold their shape when removed from the muffin tin. If they still look pale or feel soft, give them another minute or two in the oven.
Final Thoughts
Oven Baked 4-Ingredient Crispy Phyllo Cups prove that you don’t need complicated ingredients or professional baking skills to create something delicious and beautiful. With delicate layers of buttery pastry and a smooth honey cream cheese filling, these little treats offer a wonderful combination of crispness, creaminess, and sweetness.
They’re easy enough to prepare on an ordinary afternoon but pretty enough to serve at special celebrations. Make a batch for your next gathering, experiment with different toppings, and enjoy how quickly these delightful little bites disappear!






No Responses Yet