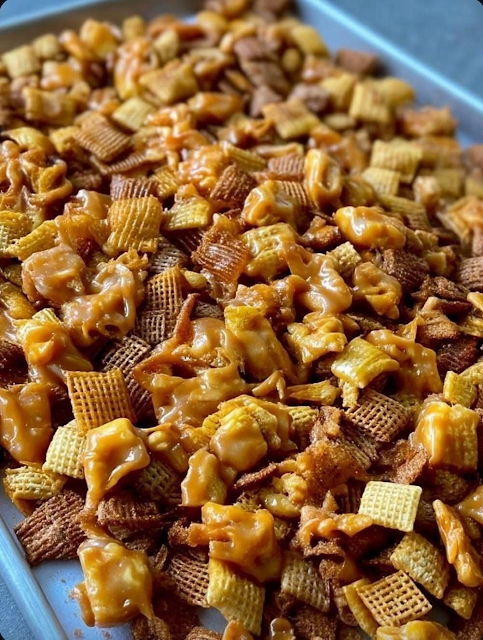
Step 5: Coat the Cereal and Pretzels
Immediately pour the warm caramel mixture over the cereal and pretzels.
Using a heat-resistant spatula, gently fold everything together until the crunchy pieces are evenly coated.
Work relatively quickly before the caramel begins to harden. Try to distribute the coating throughout the mixture so that every bite has a delicious caramel flavor.
Step 6: Spread the Mixture on the Baking Sheet
Transfer the caramel-coated mixture onto your prepared baking sheet.
Spread it into an even layer, separating any large clumps slightly if you prefer smaller individual pieces.
Sprinkle the flaky sea salt evenly over the top. This final touch enhances the buttery caramel flavor and creates the perfect sweet-and-salty contrast.
Step 7: Bake Until Crisp
Place the baking sheet in the preheated oven and bake for approximately 30–40 minutes.
Stir the mixture gently every 10–15 minutes to help distribute the caramel evenly and encourage a crisp finish.
The cereal and pretzels should look lightly toasted and coated with caramel.
Step 8: Cool and Break Into Pieces
Remove the baking sheet from the oven and allow the mixture to cool completely at room temperature.
As it cools, the caramel coating will harden and become wonderfully crunchy.
Once completely cooled, break the mixture into bite-sized clusters using your hands.
If you added chocolate chips, allow the crackle to cool completely before drizzling melted chocolate over the top. Let the chocolate set before serving.
Your homemade Salted Caramel Crackle is now ready to enjoy!
Tips for Making the Best Salted Caramel Crackle
A few simple techniques can make a big difference in the final result.
-
Use fresh cereal: Fresh crispy rice cereal and pretzels provide the best crunch.
-
Watch the caramel carefully: Sugar mixtures can burn quickly, so avoid leaving the saucepan unattended.
-
Don’t skip the baking soda: It helps create a lighter caramel coating with a delicate texture.
-
Use flaky sea salt: Larger salt crystals provide little bursts of salty flavor that complement the sweetness.
-
Allow enough cooling time: Breaking the mixture apart before it has completely cooled can make it sticky rather than crunchy.
-
Spread evenly: A thin, even layer helps the caramel coat the ingredients more consistently.
Delicious Variations to Try
One of the nicest things about this recipe is how easily you can change it depending on your preferences.
1. Chocolate Salted Caramel Crackle
For chocolate lovers, drizzle melted dark or milk chocolate over the cooled crackle. The slightly bitter chocolate complements the sweet caramel beautifully.
2. Pecan Salted Caramel Crackle
Add chopped toasted pecans to the cereal mixture before coating it with caramel. Their nutty flavor and buttery texture make this variation especially delicious.
3. Peanut Butter Caramel Crackle
Stir 2 tablespoons of creamy peanut butter into the caramel after removing it from the heat. This creates a richer coating with a subtle peanut flavor.
4. Cinnamon Caramel Crackle
Add ½ teaspoon of ground cinnamon to the caramel mixture for a warm, comforting flavor. This version is particularly lovely during the fall and winter months.
5. Chocolate Pretzel Crackle
Use extra pretzels in place of some of the cereal, then finish the cooled mixture with melted chocolate and a little extra flaky sea salt.
How to Store Salted Caramel Crackle
Proper storage is important for maintaining the crisp texture of your homemade treat.
Once completely cooled, transfer the crackle into an airtight container. Keep it at room temperature in a cool, dry place, away from direct sunlight and moisture.
It will generally stay fresh and crunchy for approximately 1–2 weeks when stored properly.
For longer storage, you can freeze the crackle in a freezer-safe airtight container for up to 2 months. Separate layers with parchment paper to prevent the pieces from sticking together. Allow it to return to room temperature before serving.
Avoid refrigerating it, as moisture can affect the crunchy caramel coating.
Frequently Asked Questions
1. Why is my Salted Caramel Crackle sticky?
The caramel may not have cooked long enough, or the mixture may not have cooled completely. Humidity can also make caramel treats sticky. Allow the crackle to cool fully and store it in an airtight container.
2. Can I make this recipe without corn syrup?
Yes. You can substitute an equal amount of honey or golden syrup. However, the flavor and texture may be slightly different, and the caramel may crystallize more easily.
3. Can I prepare Salted Caramel Crackle ahead of time?
Absolutely! This recipe is excellent for preparing in advance. Make it a day or two before your gathering and store it in an airtight container until you’re ready to serve.
4. Can I use different cereals?
Yes. Cornflakes, toasted oat cereal, and other crispy cereals can work beautifully. Just make sure the cereal is sturdy enough to hold its shape when coated with warm caramel.
5. How do I prevent the caramel from burning?
Use medium heat, stir regularly, and keep a close eye on the mixture. A heavy-bottomed saucepan can also help distribute heat more evenly.
6. Can I make Salted Caramel Crackle without an oven?
Yes. You can spread the caramel-coated mixture onto a parchment-lined baking sheet and allow it to cool at room temperature. The result may be slightly different in texture, but it will still be delicious.
Final Thoughts
Salted Caramel Crackle is the kind of homemade treat that proves simple ingredients can create something truly special. With its buttery caramel coating, crispy cereal, crunchy pretzels, and just the right amount of sea salt, every handful offers a wonderful combination of textures and flavors.
It’s easy enough to prepare on an ordinary afternoon but delicious enough to share during holidays, celebrations, and special occasions. Make a batch for your family, package some into little gift bags for friends, or keep a container nearby whenever you’re craving something sweet and crunchy.
Once you experience that irresistible sweet-and-salty caramel crunch, this recipe may quickly become one of your favorite homemade treats!








No Responses Yet