
Step 5: Add the Baking Soda
Remove the saucepan from the heat.
Immediately stir in the baking soda. The caramel will foam and become lighter as the baking soda reacts with the hot sugar mixture.
Stir just until the baking soda is evenly incorporated.
This small amount of baking soda helps create a lighter, more delicate crunch rather than an extremely dense piece of hard caramel.
Step 6: Combine With the Pecans
Quickly fold the toasted pecans into the hot caramel.
Stir until the nuts are thoroughly coated. Work efficiently because the caramel will begin thickening as it cools.
You want every pecan to have a glossy coating of caramel.
Step 7: Spread the Mixture
Immediately transfer the caramel-coated pecans onto the prepared baking sheet.
Use a heat-resistant spatula to spread the mixture into an even layer.
For a thinner and extra-crispy crunch, spread it fairly thin. For thicker pieces with more substantial caramel coating, leave the mixture slightly thicker.
Do not worry about making the edges perfectly neat. The rustic appearance is part of the charm of homemade praline crunch.
Step 8: Finish With Sea Salt
While the caramel is still hot, sprinkle the surface lightly with flaky sea salt.
The salt should be noticeable but not overpowering. A few flakes in every bite provide a wonderful contrast against the buttery caramel and naturally sweet pecans.
Step 9: Bake the Crunch
Place the baking sheet in the 350°F (175°C) oven and bake for approximately 8–12 minutes.
Watch carefully toward the end of the baking time. The caramel should become deeply golden and bubbly, but it should not turn very dark or smell burnt.
If necessary, rotate the pan halfway through baking to encourage even browning.
Step 10: Cool Completely
Remove the baking sheet from the oven and place it on a heat-safe surface.
Allow the praline crunch to cool completely without disturbing it. This usually takes around 30–45 minutes, depending on the thickness of the mixture and the temperature of your kitchen.
As it cools, the caramel will harden and become crisp.
Do not try to break it apart while it is still warm because the caramel can be extremely hot and sticky.
Step 11: Break Into Pieces
Once completely cool and firm, lift the praline from the parchment and break it into irregular pieces with your hands.
You can make large pieces for snacking or smaller pieces for sprinkling over desserts.
For a more uniform presentation, you can also cut or score the warm mixture into sections before it completely hardens.
Helpful Tips for Perfect Praline Crunch
Use Fresh Pecans
Fresh pecans make a noticeable difference. Pecans that have been sitting open for a long time can develop a stale or oily flavor.
Don’t Rush the Caramel
The sugar mixture needs enough time to reach the correct temperature. If it is undercooked, the finished crunch may remain chewy or sticky.
Watch the Color
Caramel can go from beautifully golden to burnt surprisingly quickly. Keep a close eye on it during the final cooking and baking stages.
Use a Candy Thermometer
A thermometer takes much of the guesswork out of caramel making. Aim for approximately 245–250°F (118–121°C) before removing the caramel from the heat.
Add the Salt at the End
Flaky sea salt sprinkled over the finished caramel gives you little bursts of salty flavor. It also looks attractive against the golden surface.
Delicious Variations
Chocolate Pecan Crunch
After the praline has cooled completely, drizzle the pieces with melted semisweet or dark chocolate. Let the chocolate set before serving.
Cinnamon Pecan Crunch
Add an extra 1/2 teaspoon of cinnamon to the caramel mixture for a warmer, more spiced flavor.
Chocolate-Dipped Pieces
Dip individual pieces halfway into melted chocolate and place them on parchment until the chocolate hardens.
Mixed-Nut Praline
Replace some of the pecans with almonds, walnuts, or cashews. Keep the total amount of nuts the same so the caramel-to-nut ratio remains balanced.
How to Store It
Store the completely cooled Salted Caramel Pecan Praline Crunch in an airtight container at room temperature.
Place parchment paper between layers if you are stacking many pieces.
Keep the container away from humidity, since moisture can make the caramel lose its crisp texture.
For the best crunch, enjoy it within about 1–2 weeks.
Ways to Serve It
This praline crunch is delicious on its own, but it can also turn simple desserts into something special.
Try breaking it into small pieces and sprinkling it over:
- Vanilla or salted caramel ice cream
- Cheesecake
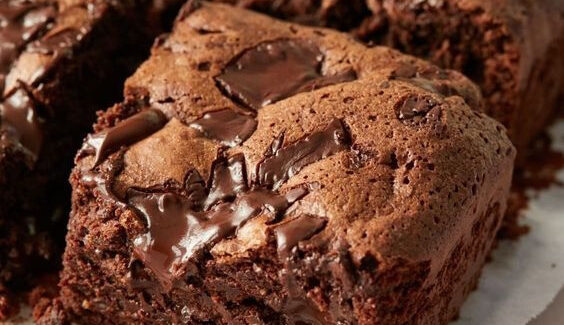
- Brownies
- Chocolate cake
- Pudding
- Whipped cream
- Apple crisp
- Banana desserts
- Pancakes or waffles
- Yogurt
You can even crush it into fine crumbs and use it as a crunchy layer in parfaits or no-bake desserts.
Final Thoughts
Salted Caramel Pecan Praline Crunch is the kind of homemade treat that delivers an impressive combination of textures and flavors with relatively simple ingredients. The toasted pecans provide a rich nuttiness, while the buttery caramel creates a crisp candy-like coating. A finishing sprinkle of flaky sea salt brings everything together.
Once you master the caramel stage, this recipe becomes incredibly versatile. Keep the pieces rustic for snacking, crumble them over your favorite dessert, or package them in small bags or jars for a thoughtful homemade gift. The combination of crunchy pecans, golden caramel, and sea salt makes every bite hard to resist.




No Responses Yet