
Step 6: Add the Cheese
Reduce the heat to low.
Add the cheddar, mozzarella, and Parmesan gradually, stirring after each addition until melted.
The result should be smooth, creamy, and thick enough to generously coat the cauliflower.
Avoid boiling the sauce once the cheese has been added. Excessive heat can cause cheese sauces to become oily or grainy.
If the sauce seems unusually thick, stir in a small splash of milk until it reaches a creamy consistency.
Step 7: Combine the Cauliflower and Cheese Sauce
Place the drained cauliflower into a large mixing bowl.
Pour the warm cheese sauce over the florets.
Using a large spoon or spatula, gently fold everything together until the cauliflower is evenly coated.
Take care not to stir too aggressively. You want to keep the cauliflower pieces intact rather than turning them into mash.
Step 8: Transfer Everything to the Baking Dish
Pour the cheesy cauliflower mixture into the prepared baking dish.
Spread it into an even layer.
At this stage, the casserole is already delicious, but the final topping is what gives it that classic baked finish.
Step 9: Prepare the Golden Topping
In a small bowl, combine the breadcrumbs, melted butter, and Parmesan cheese.
Sprinkle the remaining cheddar evenly over the casserole first.
Then scatter the breadcrumb mixture over the top.
The cheese melts into a rich layer while the breadcrumbs become lightly crisp in the oven.
For an extra touch of freshness, you can reserve the parsley until after baking.
Step 10: Bake Until Golden and Bubbly
Place the casserole in the preheated oven.
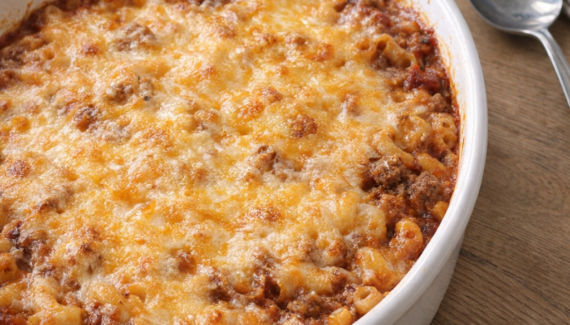
Bake for approximately 25–30 minutes, or until the sauce is bubbling around the edges and the top is golden brown.
If you want a more deeply browned surface, place the casserole under the broiler for 1–2 minutes at the end.
Watch it carefully during this stage because the topping can brown quickly.
Step 11: Let It Rest
Remove the casserole from the oven and allow it to rest for approximately 5–10 minutes before serving.
This short resting period gives the cheese sauce time to settle slightly, making the casserole easier to scoop.
Sprinkle with fresh parsley if desired.
Tips for the Creamiest Results
Don’t skip draining the cauliflower
Cauliflower naturally contains a significant amount of water. If too much moisture makes its way into the baking dish, the cheese sauce can become thinner than intended.
Shred your own cheese when possible
Pre-shredded cheese often contains anti-caking ingredients that can affect how smoothly it melts. Freshly shredded cheese generally produces a smoother sauce.
Use flavorful cheese
Sharp cheddar provides much more character than mild cheddar. You can also experiment with Gruyère, Monterey Jack, Gouda, or a combination of cheeses.
Don’t overcook the cauliflower
The goal is tender cauliflower that still has some structure. If you boil it until completely soft before baking, it may become mushy.
Keep the sauce at a gentle temperature
Once cheese is added, gentle heat is your friend. Very high temperatures can cause the sauce to separate.
Delicious Variations
Garlic and Herb Cauliflower Casserole
Add a teaspoon of freshly minced garlic to the butter before making the roux. Finish the casserole with chopped parsley, thyme, or chives.
Broccoli and Cauliflower Casserole
Replace approximately half of the cauliflower with broccoli florets. The combination creates a colorful and flavorful vegetable bake.
Crispy Bacon Version
For a heartier variation, cooked and crumbled bacon can be folded into the cauliflower mixture before baking.
Spicy Cheesy Cauliflower
Add a pinch of crushed red pepper flakes or a little diced jalapeño to the cheese sauce for gentle heat.
Extra-Golden Topping
Combine breadcrumbs with Parmesan and a small amount of melted butter before scattering the mixture over the casserole. This creates a particularly crisp topping.
What to Serve With Cauliflower Casserole
Creamy cheesy cauliflower works wonderfully as a side dish alongside roasted chicken, baked fish, grilled meats, or other roasted vegetables.
It can also be served as a simple vegetarian meal with a fresh green salad and some crusty bread.
Because the casserole is rich and creamy, lighter sides such as steamed green beans, a crisp salad, or roasted vegetables provide a nice contrast.
Make-Ahead Instructions
One of the best features of this recipe is that it can be assembled ahead of time.
Prepare the cauliflower and cheese sauce as directed, then transfer everything to the baking dish. Add the cheese and breadcrumb topping, cover the dish, and refrigerate.
When you’re ready to cook it, remove the casserole from the refrigerator and allow it to sit briefly while the oven preheats.
Because the casserole starts cold, it may need a little additional baking time. Bake until the center is completely hot and the edges are bubbling.
For best texture, prepare it no more than about a day in advance.
Storing Leftovers
Allow leftover casserole to cool before transferring it to an airtight container. Refrigerate and use within 3–4 days.
Reheat individual portions in the microwave or warm larger portions in the oven until heated through.
If reheating in the oven, covering the dish loosely with foil can help prevent the top from becoming too dark before the center is hot.
Final Thoughts
Creamy Cheesy Cauliflower Casserole is proof that a handful of everyday ingredients can become something genuinely special. Tender cauliflower, a velvety homemade cheese sauce, and a golden, crunchy topping come together to create a dish that feels both familiar and indulgent.
The secret is in the small details: lightly cooking the cauliflower instead of overboiling it, making a smooth roux-based sauce, using flavorful cheeses, and allowing the finished casserole to rest before serving.
Whether it appears on a holiday table or alongside an ordinary weeknight dinner, this bubbling, golden casserole is the kind of side dish that tends to disappear quickly.







No Responses Yet